At some point, every grower needs to pull up roots–meaning, you’ve got to transplant something. Maybe it’s tomato seedlings, or prairie coneflower that’s crowding other flowers, or an established peach tree that needs more sun. Whatever the case, the goal is to move your plant from point A to B, minimizing injury & maximizing recovery.
Transplanting is a basic skill all gardeners need, and it’s pretty simple. In general, you want to disturb the roots as little as possible to prevent injury (also known as transplant shock)–that way, your plant will quickly thrive in its new spot. Best times to transplant are early spring and fall when plants are dormant.
Obviously, there are tips, tricks, gotchas to avoid, and different ways of transplanting depending on time of year, stage of growth, and plant type. We’ll dig into all that below. (Man, that was a lame pun…)

Why is it important to transplant?
When roots of plant start to get overcrowded, the plants stop producing.
The flowers aren’t as pretty and the plants aren’t as hardy.
Most fruit plants and shrubs send out “runners” (baby plants that are connected to the parent’s root) and these can quickly overwhelm a small space.
Transplanting is helpful when your perennial garden is overflowing and you want to start another one.
It’s much more convenient to transplant vegetable shrubs to a new location when you notice you’re no longer getting the delicious fruit you once were.
If you need to take over a garden for a new project, rather than kill the plants in it, you can transplant them.
When you transplant plants, you move them to a new place.
This includes moving seedlings from a greenhouse to a garden and full-grown plants to a new location.
Transplanting can be tricky and you must take steps to minimize transplant shock.
However, if done correctly, transplanting is a convenient and cheap way to expand your garden.
Sometimes a garden doesn’t do well.
There are many reasons why this may be happening, but if it’s a location issue, you can save the plants through transplantation.
A gardener may have more success by making a garden in a new location and moving the plants.
That said, a lot of growers resist transplanting (and thinning) because they don’t want to kill their plants.
I get it.
Those are your babies!
With a little knowledge, and careful hands, you’ll actually end up with healthier, more productive plants–and more of them.
You’ll probably have so much, you can give some away!
For more ways to propagate plants–besides transplanting–we’ve got an entire article on using cuttings for propagation.
Pros of transplanting
There are a lot of great reasons to transplant.
Plants grow at different rates, as any gardener will tell you! Lettuce, peas, and beans are all early spring crops and can even withstand light frost.
If you start these seeds indoors and transplant them early in the spring, they’ll be finished early enough for you to get another full crop in the ground before the growing season is done.
Transplanting seeds & seedlings
It’s much easier to start your seeds indoors, where you can easily see the individual seeds and plant them in a seed tray or peat pods.
They’re easy to take care of and each seed can be watered individually.
You can even make a mini greenhouse to keep the seeds warm and moist indoors during cold weather.
As your seeds grow into tiny seedlings, you can select the best plants to transplant into your garden.
This means that every plant you grow in the garden is uniform and you won’t have any holes in your rows of vegetables.
By selecting the strongest, largest plants, you’re also ensuring that your plants are hardy and will be able to stand up to harsher weather outdoors, rather than leaving it up to chance if you just planted seeds directly into the soil.
There are so many benefits to starting seeds indoors.
The controlled environment is a huge plus to new seeds and it’s so much easier to “baby” your seedlings when they’re inside.
However, most people are not able to sustain a full garden inside, so inevitably the time will come when your seedlings must brave the outdoor conditions.
If you can control this time, it will result in better plants.
You can plant your warm weather plants when it’s short-sleeved shirt weather and your cooler plants when There’s still risk of light frost.
Reduce overcrowding
There’s also no risk of overcrowding when planting plants, rather than seeds.
Since you can see each individual plant as you place it in the soil, you can leave the appropriate space as indicated on the seed packet.
It’s always hard for a gardener to thin out crops as they start growing, so transplanting seedlings helps avoid some of this heartache.
Transplanting increases garden production
On a larger scale, transplanting makes economical sense.
Since you can see each plant, you do not waste water, as you do with seeds.
This can save large famers thousands of dollars in wasted water.
It’s also much better for the environment to directly water the plants and save the rest of the water.
Farmers and gardeners alike tend to spend less time and money weeding gardens and fields when plants are transplanted, rather than sown from seed. Because transplanted plants have already established root systems,
There’s more competition for weeds to start taking over the space.
This is particularly helpful for organic gardeners, who do not wish to apply pesticides to their crops.
Quicker harvest from transplanted plants
Garden crops that are harvested from transplants spend less time in the soil than ones grown from seed.
This leaves less time for extreme weather, insect infestations, and other garden pests to ruin the crop.
This allows farmers to reap greater profits due to better yields.
When plants are harvested earlier, it also frees up the soil for other plants.
This means that when initially a gardener could only grow one crop in a season, now there’s an opportunity for an additional crop.
Obviously, the profits are much higher with more crops that are able to be grown in one season!
As an added bonus, the soil becomes healthier when additional crops are grown, rather than leaving the soil to become weed infested.
Cons of Transplanting
It may seem, at this point, that transplanting all your crops is a no-brainer!
There doesn’t appear to be any sort of downfall! Not so!
Although transplanting is incredibly helpful for perennials that keep expanding and annuals that you start from seed, there are limitations.
Not every plant can be transplanted
For instance, not every plant can be transplanted.
Carrots will experience root displacement if they’re disturbed after they have been planted.
This essentially causes the plant to stop growing and results in a poor harvest.
While we’re discussing the limitations of transplanting carrots, I’ll add that each carrot seed turns into one singular carrot.
While most plants produce many fruits or vegetables, carrots do not.
It’s kind of pointless to even attempt to transplant them because of this.
There’s no use selecting the strongest carrots, since you’re only getting one from the seed anyway.
You may as well attempt to maximize your yield by planting as many seeds as possible.

You might need a greenhouse for starting seeds & seedlings
If you intend to start seeds for an entire garden prior to planting them in the garden, you will need to have some sort of greenhouse.
There are small greenhouses you can purchase that may fit on a wide windowsill, but if you want to plant many seeds, you’re probably going to need a bigger greenhouse.
If you don’t already own a greenhouse, this is definitely an investment, and one that not every gardener can make.
When you use a greenhouse to raise seedlings, although their environment is controlled by you, they also fully depend on you for survival.
They require the proper temperatures (venting the greenhouse on hot days, sealing it on cold days), adequate water (that you must provide exclusively, as
There’s no rain in a greenhouse), and nutrients that they would ordinarily get from the ground.
Caring for the young plants in a greenhouse takes a fair amount of time and effort.
Alternatively, rather than start your own seeds, you can opt to buy seedlings from a garden store or greenhouse.
This is much more costly than buying seeds, but you can adhere to proper spacing, less water, and more crops.
Transplanting can damage your plants (transplant shock)
Some plants have very fragile stems that can be broken and/or damaged when transplanting.
For instance, if the stems of melons are broken while transplanting, it will take a long time for them to recover and produce fruit.
Similarly, if the stems of cucumbers are severed, they won’t produce flowers and you won’t get any cucumbers from them.
There’s still hope for the plants, but they need time to recover.
No matter how carefully you transplant, you will still cause the roots damage.
Seed pods help to mitigate this damage as much as possible, but the roots will be damaged from moving.
Most plants can overcome this damage, but plants that are grown from seeds and not moved tend to be more drought resistant, due to stronger roots that have not been disturbed.
Finally, when you transplant plants, you always run the risk of transplant shock.
Transplant shock
What is transplant shock?
This can refer to the roots not taking hold in a new environment, a shortage of water, or an attack of pests.
When these stressors attack the newly moved plant, it may go dormant, become stunted, or die.
While there’s typically no cure for transplant shock, there are a few treatments that may help to save your plants
Better yet, you can usually avoid it altogether.
If a plant starts to look wilted shortly after transplanting, there’s likely a water retention issue.
Sometimes this means the roots were not broken up enough prior to transplant and can quickly be solved by digging around the plant, breaking up the roots, and soaking.
Other times, it indicates that the roots haven’t fully taken hold in their new surroundings.
Give them additional water, and the plants should start to bounce back.
Transplant shock can also occur in any plant that is transplanted.
Fixes for transplant shock
While there’s no cure for transplant shock, you can help your plant through it.
- Fertilize, water, and wait.
- Try trimming the plant back. This works because smaller plants focus more energy on root growth, as they do not have to expend energy growing leaves or stems.
- Always keep transplants moist (but not waterlogged), and ensure they have good drainage.
Transplant shock in trees
In trees, transplant shock is frequently characterized by scorched leaves.
The leaves begin to turn yellow prematurely (i.e. not in autumn) and then turn brown and fall off.
Alternatively, the leaves may appear wilted, and fall off the tree. Eventually, the shock will spread to the twigs and trunk of the tree, and the tree will die.
Scorched leaves in transplanted trees is typically due to poor water retention.
Either the tree is simply not getting enough water, or it’s unable to gather the water.
It’s easy enough to provide water for the tree, but if there’s an issue with the roots’ ability to absorb water,
There’s likely no saving the tree from transplant shock.
If you’re able to save the tree by providing sufficient water, it still may display the effects of transplant shock for a year or two.
Leaf growth will be severely reduced and the truck won’t thicken as it would had the tree not been transplanted.
Transplant shock in perennials, annuals, & biennials
Luckily, most plants recover from transplant shock quicker than trees.
You certainly can’t wait two years for a cucumber to get over transplant shock!
However, garden plants will display similar characteristics if they’re suffering from transplant shock.
The plants will begin to wilt and won’t thrive in their new environment.
Alternatively, plants suffering from transplant shock may go dormant.
Just this spring, I had a tomato seedling that broke during transplant and it resulted in a dormant plant.
It didn’t grow for two months, but it also didn’t die.
Finally, at the end of August, it shot up, and now, in October, it’s finally producing fruit. I provided it with water and fertilizer, but it simply needed time to heal itself.
How and when to transplant
The best times to transplant are in early spring and late fall.
The majority of transplanting should not take place in the summer, when plants’ focus is on producing fruit and growing taller.
However, different plants have different requirements when it comes to transplanting.
Always check when the appropriate time for transplanting your specific plant, but there are some general guidelines.
In general, plants should not be planted any deeper than the roots were already.
Many times, instructions for transplanting trees and shrubs will tell you to dig a hole that is twice as deep and twice as wide as the pot that it was sold in.
These instructions are because you need to backfill the hole with organic material and loose soil prior to planting the transplanted plant.
You always want to ensure you’re providing proper soil for transplanted plants.
You don’t want to stick the tender roots into hard soil.
They’ll have a difficult time taking hold and it may cause transplant shock to be worse.
Watering after transplanting
You should water plants both prior to and immediately after transplanting.
You don’t want the soil to be soaking, but you definitely don’t want to plant dry roots.
The plant roots need water, but they also need air–otherwise it’ll literally drown.
Root care during transplanting
The roots should be damp and pliable.
If you’re transplanting from a seed tray, gently break up your roots.
If you’re transplanting from the ground, avoid disturbing the roots.
After you’ve finished planting, you need to gently water your plants and the soil surrounding them.
Ensure you’ve an appropriate attachment for your garden hose, or consider using a soaker hose, sprinkler, or watering can if you don’t.
A sharp blast of water can uproot your transplants.
If the transplants are more established plants, they likely have a rootball. Ensure you don’t disturb this rootball.
It should be as intact as possible, and it should also be quite wet.
Acclimatizing plants after transplanting
Always transplant early in the morning or on a cloudy day.
This gives your transplants an opportunity to get used to their new surroundings without being immediately exposed to the hot midday sun.
When you’re moving plants from indoors to outdoors, give them the best chance for survival by slowly acclimatizing them to their new environment.
Roughly a week before you plan to move them outdoors, drastically cut back on the water you would ordinarily provide for the plants and stop fertilizing.
After a week, move the plants outside to a cloudy location.
Allow them to remain in their pots for a few days.
Water them prior to transplanting and then transplant them directly into your garden.
Fruiting and flowering shrubs
For fruiting and flowering shrubs, transplant when dormant. In warmer climates, this means transplant from November-December and in March. In cooler climates, transplant between September-October and in April.
The ground should not be frozen, but the plants should not be growing.
This means that if you’re moving your shrubs in the fall, the leaves should not be growing and should be starting to turn brown and fall off.
If you’re transplanting in spring, the plants should not be budding.
Transplant the shrubs directly into the ground.
Do not store them in pots or encourage root growth in water. You will have best results if you move them with as much soil as possible attached to the roots and quickly place them in their new home.
You can also transplant the runners (or daughter plants) that fruit shrubs often send out.
Perennial flowers
Perennial flowers should be transplanted according to their blooming schedule.
Late blooming perennials (goldenrod, chrysanthemum, aster) should be transplanted in spring, before they start to bud.
These flowers should be carefully dug up with as much extra earth as possible attached to the roots.
Early blooming perennials (yellow bleeding heart, barrenwort, chives) should be transplanted in the fall, after they have finished blooming.
Since these perennials start to bud so early, it can be risky to move them in the spring, if the ground is still too cold or
There’s frost risk. You don’t want to weaken the plant by moving it too early, so it should be moved for the next growing season, rather than the current one.

Succulents
Succulents are often planted indoors in pots, although in warm climates, they can grow outdoors.
If you have succulents indoors, they should be transplanted roughly every two years to replace the nutrients in the soil.
If succulents are not native to your climate, it’s important to transplant using proper succulent soil.
You can make your own succulent soil by mixing potting soil, perlite (they’re the small, Styrofoam-looking balls that are in commercial potting soil mixes), and coarse sand, but it must be porous.
If you’re worried that you don’t know what you’re doing when making your own succulent soil, just buy a commercial succulent or cacti soil!
The pot that you’re transplanting your succulents into needs to have adequate drainage.
Make sure the pot has a decent drainage hole. If your pot doesn’t have a hole, a thin layer of rock at the bottom will suffice.
Transplanting succulents is slightly different than transplanting other plants.
Succulents have incredibly delicate roots and don’t like to sit in water.
In fact, you want to have dry roots when transplanting succulents. If your roots are wet, leave them out for a day or two, until they’re completely dry.
When you remove the succulent from its previous home, dig around it slightly to ensure you’re getting all the roots.
Once you’ve removed it from the pot, gently brush as much of the dirt from the roots (totally opposite of the other plants described!).
Dig a small depression in the new pot and coil the succulent roots in a “nest.”
If your succulent hasn’t been watered in a while, after repotting is a good time to do so.
If your succulent was recently watered prior to replanting, leave it for a week or so to get accustomed to its new home.
Vegetable annuals
Vegetable annuals should be transplanted according to the vegetable’s preferred temperature.
Cool weather crops (beans, greens, peas) can either be planted early in the spring so they reach full maturity prior to the summer heat, or in late summer, so they can mature in late fall.
In cooler climates, you may not be able to get a full crop if planted for a fall harvest, so plan accordingly!
Warm weather crops (peppers, tomatoes, cucumbers) should be transplanted when it’s warm enough outside to comfortably wear a short-sleeved shirt – late spring to early summer.
If these plants have been started in a greenhouse or indoors, they can be quite established by the time it’s warm enough to plant them in your outdoor garden!
These plants cannot take frost, so if you’ve transplanted too early, ensure they’re covered if There’s risk of frost!
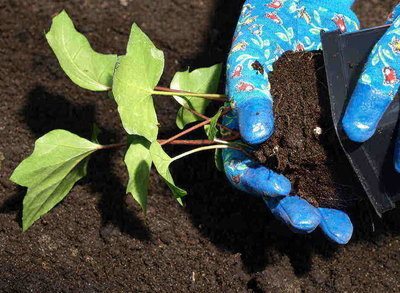
Transplanting steps:
Here’s the general process for transplanting any plant:
- Ensure that your plants are ready for transplanting. They should:
- Be mostly dry and have had an opportunity to “dry out” in their pots.
- Have established root systems.
- If moving from inside to outside–be acclimatized to the new climate they’ll be moving to (spend time outdoors in their pots).
- Check the day’s weather and long-term forecast. It should:
- Have no risk of frost (for warm weather seedlings), or,
- Have low risk of frost (for cold weather seedlings).
- Ideally be cloudy for the day you intend to transplant. Otherwise, transplant as early in the day as possible.
- Prepare the soil for the new transplants. It should:
- Be weed-free and as loose as possible. Till it if that’s an option.
- Be mostly dry, but not completely dry.
- Have holes dug for the new transplants. The holes can be slightly backfilled with organic material, manure, and potting soil.
- Plant your seedlings in the garden!
- Gently ease the moistened seedlings out of their pots/trays.
- If there are a lot of roots, gently break them up.
- Place the roots in the hole and gently pack earth around it.
- Water your transplants with a gentle stream of water. Don’t blast them with a hose.
- Fertilize your garden and tend to it as you would with plants sown from seeds.
To transplant more established plants, follow the steps listed above.
However, follow the guidelines outlined in the “How and when to transplant” for the ideal time of year to move your desired plant.
If the plant has a rootball, take as much care as possible not to disturb it throughout the transplanting process.
Things to watch out for
Generally, transplanted plants thrive in their new environment.
However, they need to be babied in the days (and in the case of trees, months) after the transplant occurs.
It can take the roots some time to become accustomed to being in a new garden or pot, and this can cause issues with water retention early on.
Always ensure you’re watering at the base of a plant, so the water reaches the roots as quickly as possible.
Transplanted plants often require additional water shortly after planting because a lot of the water drains away before the roots manage to use it.

Related Questions
Methods of transplanting
Your method of transplanting will depend on the container it’s initially in and the place that you intend to relocate it to.
If it’s in a seed tray or pot, gently work the plant out and transfer to a hole in the ground.
If the plant is in a peat pot, gently break the pot and place in a hole.
If the plant is already in the ground and you wish to move it to a new location, dig out as much dirt as possible around the roots when moving it.
Is it OK to transplant during flowering?
It’s OK to transplant during flowering, but you need to be extra careful not to disturb the tiny root hairs at the end of the roots.
Otherwise, your plant won’t be able to capture water & key nutrients.
During flowering, plants put a lot of energy into producing flowers, pollen, and nectar. Ideally, you’d wait to transplant until after flowering is done, but with extra care, flowering plants can survive transplanting just fine.
Can plants recover from transplant shock?
Yes. Plants can absolutely recover from transplant shock.
Sometimes, you can help it along by providing extra water (and extra drainage), cutting the plant back, changing the soil pH, or making a simple sugar/water solution, but most plants will recover from transplant shock on their own.
What is the best time to transplant seedlings?
The best time to transplant seedlings depends on the weather the seedlings prefer.
If it’s an early perennial, transplant in late fall. If it’s an early annual, transplant in early spring.
If it’s a late perennial, transplant in early spring. If it’s a late annual, transplant in early summer.
Trees and shrubs should be transplanted when dormant (early spring or late fall). We’ve got an entire article on how to transplant seedlings.
Which vegetables can be transplanted?
All non-root vegetables and some root vegetables can be transplanted.
If your greenhouse lacks space, strategically, you want to plant seedlings that take a long time to grow (melons, tomatoes, onions).
Some plants do better with direct sowing, due to delicate root systems.
These include carrots, peas, and spinach, to name a few.