
It’s very rewarding to raise your fruits, vegetables, and herbs from infancy by starting them inside in a seed tray and then transplanting them into their more permanent pots or beds. Seedlings are fragile beings, however, and the timing of your transplant can spell the difference between flourishing and failing.
You’ll want to transplant your seedlings soon after they’ve grown their “true” leaves, which will develop after the “seed” leaves. Transplant when the weather is mild, and be sure to allow about a week of “hardening off”, so your seedling can adapt to its new environment.
You can also read our guide: when to use nutrients & fertilizers with seedlings.
When to transplant seedlings from seed tray
Mastering all the variables in transplanting your seedlings can be tricky, but is crucial to the future success of your seedlings.
Nailing this delicate transition period will set up your seedlings for growth and success, saving you time, money, and frustration in the future!
Picking the Perfect Time
Identifying your Leaves
While your seedlings are growing in their tray, keep a close eye on the leaves they’re developing.
There are two different kinds:
- seed leaves (or cotyledons)
- true leaves
Identifying these two kinds of leaves is critical for knowing when your seedling is mature enough to be moved.
Seed leaves:
- May not even be visible on some kinds of plants!
- E.G. Green peas, corn, mangos
- If visible, they will be simple and smooth looking, quite different than the leaves of an adult plant
- May appear as a pair or individually
- Are usually near the base of the stem
- Store nutrients for the seedling, like the plant version of an egg yolk
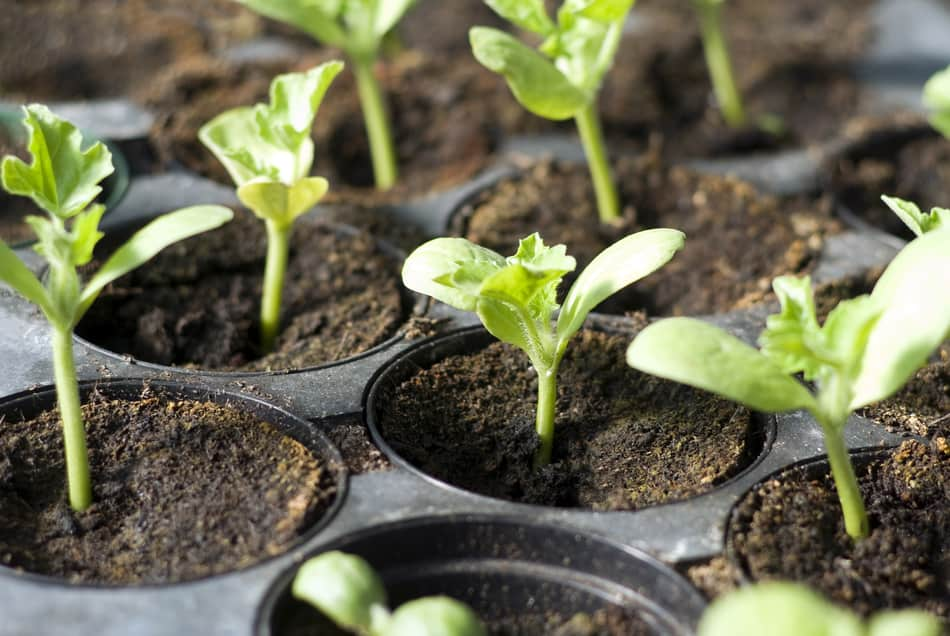
True Leaves
- Will appear after the seed leaves
- Look like miniature versions of the adult plant’s leaves, with unique shapes, ridges, and hairs
- All leaves that form after the first set of true leaves will be identical to it/them and to each other
- Perform photosynthesis for the plant
The appearance of true leaves is the signal that your plant is nearly ready for transplant, and that it’s time to begin hardening off!
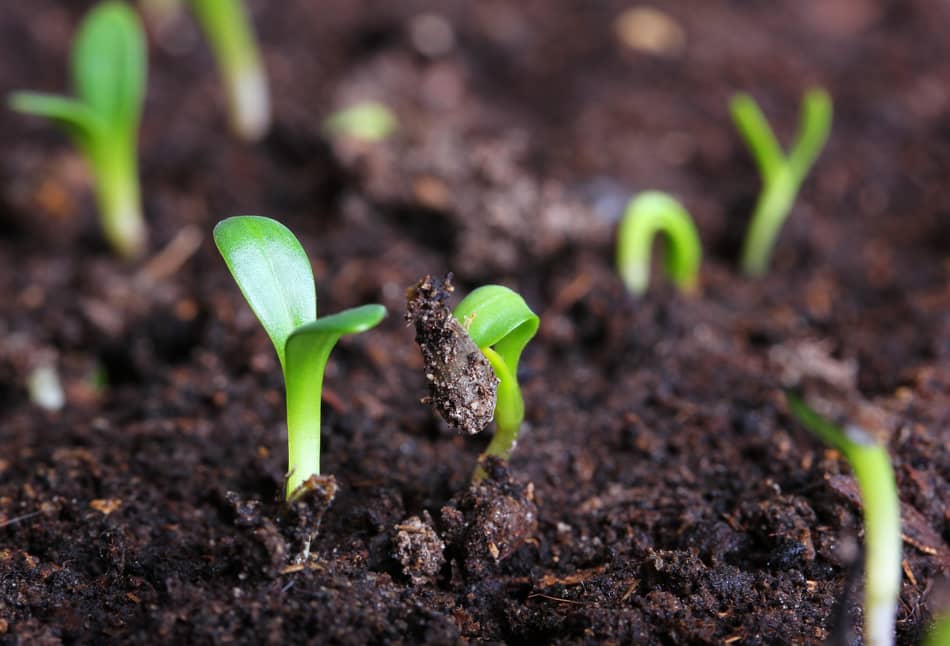
 Seedlings with cotyledons and true leaves
Hardening off
Hardening off is a 7-10 day process where you gradually increase your plant’s exposure to outside conditions.
The process of hardening off gives your seedling the time it needs to adapt to its new environment and be prepared for its post-transplant life.
Transplanting without hardening off can shock your seedling’s system, and put it at major risk
On the first day, put it outside for 2-3 hours in a shady area with limited exposure to the wind.
The next day, leave it out for 3-4 hours in slightly more intense sunlight, and so on.
During the last couple of days, make sure that your seedling stays outside overnight to get acclimated to the cooler twilight temperatures.
If the weather is bad on one of your hardening off days, like in the case of a rainstorm or cold snap, delay hardening off until things calm down.
Weather Conditions
When the big moment arrives, and you’re finally ready to move your seedling to its outdoor home, try to pick a day with relatively mild weather.
Your seedling will be in a state of confusion right after the transplant, and anything you can do to make the transition a gentle one will increase its chance for success.
Here are some tips for keeping things nice and easy:
- Check your local vegetable planting calendar to find the ideal transplant dates for your specific plant
- Try to first plant your seedlings in their trays 6-8 weeks before this date, so they have plenty of time to grow
- Transplant in the early morning, late afternoon, or when it’s cloudy to limit the direct sunlight your seedling is exposed to immediately following the move
- Whatever you do, don’t transplant your seedling into a frost! It will almost definitely die
NOTE: Some species of plants should NOT be started inside in seed trays, but instead directly seeded outside in your garden or greenhouse.
Plants more suited to direct seeding are usually hardier and grow more quickly than those which do well starting in a seed tray.
Examples include for each kind include:
| Direct seeding | Seeding in tray |
|---|---|
| Beans Beets Carrots Melons Peas Radishes Spinach Squash Turnips Zucchini | Broccoli Celery Collard Greens Eggplant Kale Kohlrabi Leeks Onion Peppers Scallions Tomatoes |
If everything goes perfectly, you should have large, healthy, hardened-off seedlings with well-developed true leaves right around the recommended date to transplant.
Yet as you may know, adventures in gardening rarely go completely as planned.
So, here are a few more good decisions you can make to give your seedlings the best chance at life you can.
Transplanting Tips: What kind of soil should I use?
In the Seed Tray
If you’ve been taking notes, you may remember that seedlings get the nutrients they need from their seed leaves.
So when starting them in your seed tray, you don’t necessarily need a nutrient rich potting soil.
Instead, go for something that’s light and well aerated, so that the roots of your seedling have plenty of room to stretch and grow.
You’ll want to make sure that the soil you use is classified as sterilized, meaning its been treated to be as free from contamination as possible.
Disease Prevention
Sterilized soil is important, since even a small amount of mold or fungus can do major damage to a tender young seedling.
During your plant’s infancy, a top priority should be keeping it totally disease free, and your soil should reflect that.
You can actually get what’s called soil-less starting mix, commonly made from things like peat moss, sand, or bark, which lets you be completely sure your “soil” is as clean as can be.
But be aware that this will need to be changed out for the real deal when you move your seedlings out of the tray.
Once Transplanted
Light and well aerated potting soil is the best kind for your seedlings to be transplanted into, as well.
It’s easy to find soils specialized for this purpose online or at your local garden supply store.
Again, keeping things as gentle as possible during the transition period will give your seedlings the best shot at success.
Once planted, water the soil to the point where it becomes damp but not soaked.
Adding fertilizer to the planting area can be helpful, but only use it at half strength so as not to overwhelm the seedling.
Moving your seedlings safely
Technique: how to do it
The actual, physical process of moving your seedling from the seed tray is rife with danger.
The most important thing to keep in mind is DO NOT grab the seedlings by the stems! This is an excellent way to damage or even break the stems.
Instead, un-pot your seedlings by turning them upside down and gently tapping the bottom to remove the whole thing at once.
Do your best to keep the soil and roots intact. If the soil kind of sticks to the inside of the pot, you can use a quarter to help ease it out.
Are the seedling’s roots wrapped around the soil in a twisted spaghetti fashion?
Then carefully unwind them so the roots are all facing outward. This allows the roots to spread more easily once transplanted.
Hole Size
The hole you dig in your planting area should be shallow enough to allow the seed leaves to be above ground (if present).
If you’ve been using a biodegradable pot, like a peat pot, the process is much easier.
Simply dig an appropriate sized hole in your bed, and fully immerse your pot in the soil.
Don’t leave any part of the pot above ground, as this can lead to a drying out of your plant very quickly.
Thinning out Seedlings
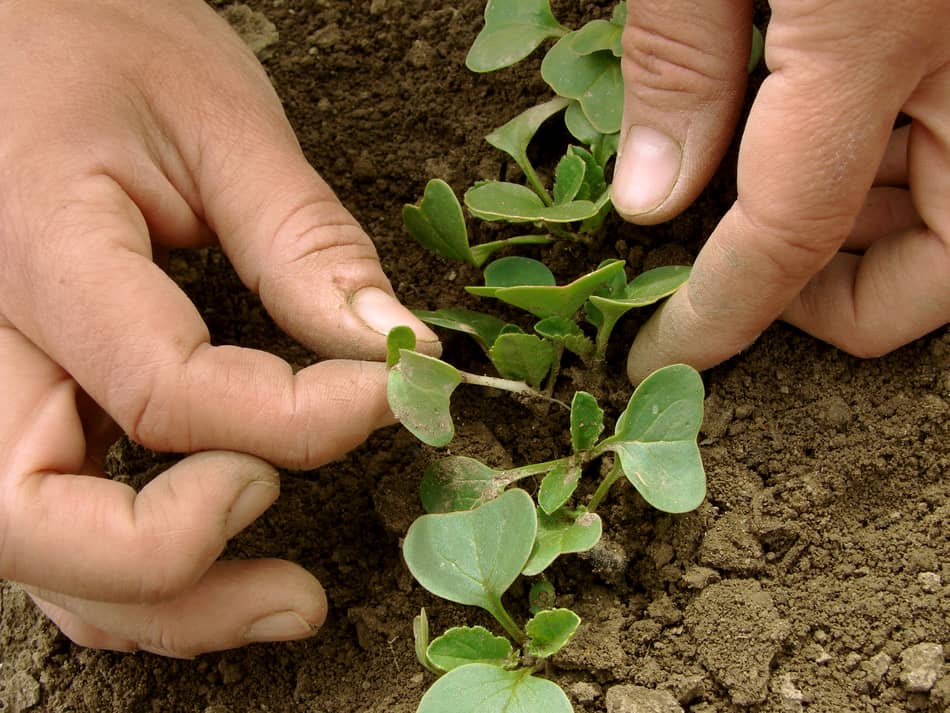 Thinning seedlings
What is it and why should I do it?
Thinning seedlings is the act of removing certain individuals from the seed tray or planting bed/pot.
Thinning seedlings is best done when the seedlings grow too close together and become so crowded that none of them can grow properly.
It might seem counter-intuitive (and not a little depressing) to effectively kill one of the seedlings that you’ve worked so hard to raise.
But the competition that overcrowding causes can easily stunt the growth of your whole crop.
When to Thin Out Seedlings
Knowing if, when, and how much you need to thin out your seedlings requires a bit of thought.
When they’re still in their seed trays, it’s pretty straightforward: Keep it down to one seedling per cell.
For seedlings that were planted directly into the garden, there should be instructions on your seed packet which lay out the space requirements for your seedlings.
Thinning Technique
Do the deed using a pair of micro-tipped pruning snips, or even just a small pair of scissors, well sterilized with rubbing alcohol beforehand.
Cut the seedlings near the base of the stem, but leave the roots alone, or you could risk damaging the roots of nearby plants.
Look for and thin out the weakest looking seedlings, leaving the stronger looking ones alone.
If you’re not sure which seedlings are the healthier ones, then just thin them at random.
It’s best to thin your seedlings as early as possible, so as to allow the survivors as much unimpeded growth as possible.
Related Questions
Can I Make my Own Seed Trays?
You can easily find seed trays online or at your local garden supply store.
But for economically-minded gardeners, there are some common household items you can use that work just as well!
- Paper (not Styrofoam!) egg cartons: Cut the carton in half and place seeds in each cell. Easy to find and pre-segmented for your convenience. They can even be planted right into the ground!
- Solo Cups: Not just for cheap beer. These are great for starting seeds that need a lot of time in the tray, since they hold a relatively large amount of soil.
- Toilet paper tubes: Put some Saran wrap over one hole, and remove it before transfer.
Benefits of Growing Vegetables Yourself
- Home-grown fruits and veggies have more flavor and nutritional value than those you get at the store.
- It can be a great way to get your kids involved with nature, especially using some of the craft ideas above.
- You can be sure that your food is GMO and pesticide free.
- You can read more in our comprehensive guide to growing veggies year-round.