Kale is an easy and rewarding vegetable to grow in your home garden. With a little know-how you’ll soon be enjoying the taste and nutrition of fresh picked kale.
Grow kale in full sun to part shade. The soil should have moderate amounts of nitrogen, phosphorous, and potassium. Sow seed in early spring for a summer crop, and late summer for a fall crop. Stagger plants 16 inches apart, water regularly, and harvest throughout the growing season.
Some good seed and a little bit of sweat will get you pretty far in growing great kale. However, knowing a thing or two about the fine details of growing kale will ensure an abundant kale harvest. I’ve grown kale in home gardens, small family farms, and on certified organic farms. I’ve known kale fails and kale glory first hand. So grab your favorite beverage & read on for some savvy grower how-to.
Kale background
Kale is a cultivar (a variety of plant created through selective breeding) in the famous Brassica plant family. The Brassica family includes vegetables like cabbage, collards, bok choy, brussel sprouts and broccoli.
Kale originated in the eastern Mediterranean area as early as 2000 B.C. Kale first appears in European documents in the 13th century. It wasn’t until the 19th century that kale made its way into the USA.
The 1990’s heralded kale’s placement into the vegetable hall of fame, as this is when the awesome nutritional profile of kale became common knowledge.
The 411 on kale botany
Kale is a biennial plant. This means that it has a two-year life cycle. In the first year of growth, biennial plants put down roots and send up leaves. The leaves die back in late winter and regrow in the spring.
It’s also in the spring of the second year that a biennial plant will flower and set seed.
Most gardeners pull their kale plants in late winter of the first year.
Growing basics
There are a few things that all plants need to grow. Water, sunlight, macronutrients in the soil, and proper soil pH are the foundation of the garden.
Nutrient requirements
Know your NPK?
Wait, what?
NPK are letters that mean a lot to a gardener. They stand for nitrogen, phosphorous, and potassium . Nitrogen, phosphorous, and potassium are known as “macronutrients” in the soil.
These macronutrients will be found in varying levels in your garden soil, depending on a lot of different things. Different plants require different levels of each nutrient to achieve optimal growth.
Kale is pretty easy-going here. It likes moderate amounts of each of the macronutrients.
pH requirements
Soil pH is a measurement of acidity and alkalinity in the soil.
It actually has to do with the activity of hydronium ions in the soil, but we gardeners don’t need to worry ourselves with those details.
Soil pH is measured on a scale from 0 to 14. On this scale, 7 is considered neutral. Anything below 7 is considered acidic. Anything above 7 is considered alkaline.
Most garden vegetables prefer soil that has a pH in the range of 5.5 – 7. Kale prefers a pH of 6 – 7.5.
Water requirements
Kale likes a lot of water during the growing season.
If it hasn’t rained in a few days, then it’s probably a good idea to give your kale plants a drink.
It’s recommended to give kale 1 to 1 ½ inches of water per week.
You don’t need to physically measure the amount of water you give your plants. You want to find that sweet spot between refreshing the plant’s water supply and taking it for a swim.
If the ground feels moist for an inch below the soil’s surface your kale will fare well. Kale’s water requirements decrease after the first frost.
Sun/Shade
Generally speaking, kale will grow best in full sun. This means that your kale plants should get at least 6 hours of direct sunlight. Kale will tolerate less than 6 hours of sunlight, but your harvest will be smaller.
Temperature & frost-tolerance
This is one of the areas where kale really shines. Kale actually tastes better after a frost or two!
When most of the garden is long gone, kale will be still be feeding you.
Kale can survive to around 10 degrees Fahrenheit. That’s serious cold-hardy!
It’s important to note that the plants won’t continue to grow at this point, but will maintain the leaves that are already present.
Any leaves that are touching the ground at first frost will be lost, so remember to harvest leaves from the base first.
Plant Spacing
Kale plants do well with 12-18” of space between plants.
Try staggering two rows of plants and intercropping (filling the spaces between plants) with spinach, chard, or onions.
If you’re short on garden space, kale is a great vegetable to grow in containers in a sunny spot.
Prepping the garden bed
The importance of good garden bed preparation cannot be understated.
Ideally garden preparation is done in the fall for the next year’s garden.
Do this work and you’ll be rewarded with a healthier garden that requires less work in the long term, and will be so much more enjoyable for you during the heat of midsummer.
Soil tests
In the fall, obtain a soil test kit or find your nearest agricultural extension office.
Soil test kits can be purchased from a variety of places and come in a range of complexities and prices. Many test kits will only test for pH. I recommend finding a test kit that tests pH and soil macronutrients (NPK).
The other option is to take a soil sample to your local extension office and they will send the sample to a lab for you.
Amending the soil
After you’ve received the results of your soil test, the next step is to add material to your garden beds to correct for any deficiencies you may have discovered.
Here’s a rundown of some common amendments of the garden macronutrients:
If your soil is low in nitrogen, try adding:
- Blood meal
- Fish emulsion
- Well composted manure
If your soil is low in phosphorus, try adding:
- Bonemeal
- Rock phosphate
- Superphosphate
If your soil is low in potassium, try adding:
- Greensand
- Seaweed
- Wood ashes
Amending for pH is a reliable way to greatly improve the health of your garden.
Raising pH in soils (often referred to as “sweetening” the soil) can be done by adding:
- Calcitic limestone
- Dolomitic limestone
- Wood ash
Lower soil pH by adding:
- Acidic organic material (pine needles, peat moss, leaf mold)
- Aged sawdust
- Agricultural sulfur
Mulch
At this point, in an ideal world, it’s late fall and you have tested your soil and added the needed amendments. It’s now time to do what I refer to as, “putting the garden to bed”.
This basically involves covering your garden beds with a thick layer of mulch so that you don’t lose any of the good stuff that you’ve been working so hard to add into your soil.
I like to use a thick layer of composted leaves on my garden beds, but straw or well-rotted hay are both acceptable choices for mulching.
Come spring, all that you’ll need to do is pull back the mulch and plant those beautiful kale plants.
Kale Varieties
You are now armed with plentiful knowledge to get some excellent kale harvests from your garden.
So what type of kale is the best choice for you to grow in your home garden?
There are multiple kale varieties on the market with many similar attributes. All varieties of kale will offer the same nutritional profile and require the same essentials for growth.
Heirloom vs. hybrid
Heirloom seed is open pollinated seed that grows true to type. These seeds have been preserved and passed down over multiple generations. Home gardeners can save heirloom seed, and grow the same variety the following season.
Hybrid seeds have been intentionally bred to bring desirable characteristics of different plant varieties into one plant. If you save seeds from a hybrid plant, those seeds will produce plants that are unlike the parent plant. So, beware!
Heirloom seeds often produce better tasting and healthier vegetables.
Hybrid plants come with built-in resistance to certain diseases.
Most Popular Kale Varieties
| Kale Variety | Details |
|---|---|
| Redbor Kale |
Deep purple/red color, wavy leaves, mild flavor, heirloom |
| Siberian Kale |
Pale green, most cold hardy variety, heirloom |
| Red Russian Kale |
Pale green leaves with purple stems, tender leaves and stems, heirloom |
| Lacinato/Dinosaur Kale | Dark green leaves, Italian variety, mild flavor, tolerates both heat and cold well, heirloom |
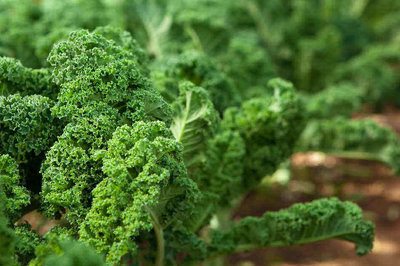
| Curly Kale | Most common type of kale, light to dark green with wavy leaves and woody stems, heirloom |
| Winterbor Kale | Very hardy variety, good for growing in containers, long lasting harvest, heirloom |
Growing kale from seed
Kale is a vegetable that can be grown by direct seeding into the garden, or by growing in flats and then transplanting the plants into the garden. Different gardeners have different reasons for choosing their method of planting.
Direct seeding
This is a term used for the method of planting your seeds directly in your garden bed.
This method requires less material and less space and may be less time consuming than starting plants in pots.
You’ll want to sow kale seed into your garden in late spring after your last frost for a summer crop, and in late summer for a fall crop.
Seeds should be planted ¼-½ inch deep leaving 12-16 inches between plants.
Here’s what you’ll need if you choose to direct seed:
- Seed
- Ruler
- Garden rake
- Sticks to mark your row with
- Hose/watering can
- Compost (optional)
You’ll first want to clear the row where you’ll plant your seed of any mulch. Rake the soil into a smooth plane. If you are staggering your plants along two rows, you’ll want the area to be large enough to accommodate two rows 12-16 inches apart.
There are many methods for marking rows and planting seeds.
Here’s one: Measure ¼-½ inch below the soil surface where you would like to start planting seed and make a hole there to that depth. Measure 12-16 inches and make another hole to the same depth. Continue to do this for the length of your row. Mark each end of your rows with a stick.
After all of your holes have been made, go back and fill them with seed. I like to put in at least three seeds per hole because there are endless things that can happen to seeds & seedlings that prevent them from growing into viable plants.
I wait until I’ve filled all of my holes with seeds before I cover them with soil. You can cover your seeds with garden soil or compost.
Direct seeding: watering
After the seeds have been planted and covered, give them a nice soaking with your hose or watering can. Beat your chest and stomp your feet while chanting, “Kale, oh yeah! Kale, oh yeah!” Just kidding, but who knows, it might help!
Water your seeds daily if it doesn’t rain. It’s okay to let the soil dry out between watering. That wet to dry and wet again is part of what help the seed coating to crack. If all goes well you should see germination in five to seven days. Thin seedlings to one plant per hole when seedlings have at least two true leaves.
Planting seeds in pots
A second method for starting kale plants is to plant seeds into pots before transplanting them into the garden. This method allows for more control over water, temperature, sun … just about everything. If you have a sunny spot in your house, use grow lights, or have access to a green house, then you can start kale seed earlier in the season and have plants ready to plant out after the last frost in your area.
Here’s what you’ll need if you are planting seed into pots:
- Small containers to plant in (about 2” in diameter)
- Seed starting soil mix
- Seeds
- Ruler
- Sunny spot to put pots
- Popsicle sticks
- Permanent marker
- Water
Get your container filled with soil, leaving at least ¼” of room at the top. Measure ¼-½” inch below the surface of the soil and make an indent to that depth using your finger. Make all of your holes and fill with about three seeds per hole. Cover with soil and water. Use your popsicle sticks and permanent marker to write the plant type and date and stick in containers, being sure not to disturb seed.
Place your pots in the sunny spot you have designated for this purpose. Make sure to water your pots daily.
After your seedlings have emerged and have grown at least two true leaves (and all threats of frost have passed) it will be time to transplant them into the garden. This is best done on a cloudy day or close to evening, so that seedlings aren’t stressed by intense sun.
Or, you can harden off your seedlings for a week or so before transplanting them outdoors.
Prepare your bed and plant out seedlings in rows, staggering plants 12-16″ apart. Keep seedlings well-watered.
General Care During the Garden Season
Kale is a pretty easy-going vegetable to grow. Some basic attention will see you harvesting healthy and delicious kale for many months.
Watering, Weeding, Mulching, Feeding
Keep your kale plants watered to a depth of about 1” below the soil surface. Too much watering is bad for plants and it causes plants to develop shallow root structures which leads to weaker plants overall.
After your seedlings have put on a few inches in height, it’s time to start weeding. Plants at this size are less likely to be damaged when you run a hoe through the rows.
After you have weeded, give your plants a good soaking and then pile on the mulch. You can use either leaves or straw that has not been treated with pesticides.
I like to use leaves that have been partially composted. Check with your town to see where the township dumps their leaves in the fall. People are often allowed to pick up large amounts of leaves for free, and this is an excellent resource for your garden.
Make sure that the mulch is not touching the base of your kale plants.
A nice, thick layer of mulch will greatly suppress weeds and keep soil moisture from evaporating.
A good, balanced fertilizer can be used once a month on plants throughout the growing season. I like to use fish emulsion, but there are many good ways to feed your plants. Follow package directions if you buy fertilizer.
If you make your own compost, you can apply compost around the base of your kale plants and water in well, about once a month. Refrain from applying fertilizer as you get closer to your first frost in the fall.
How to harvest kale
There are two different ways to harvest kale. Either harvest single leaves as they mature or full heads after they have formed. The most common way of harvesting is to harvest single leaves. Harvest from the base up.
After your first frost, your plants will no longer put on new growth, but the leaves that are there will be maintained.
Any leaves that are touching the ground at the time of frost will rot.
If you live in a very cold climate, consider using row cover or large buckets to protect your plants and extend your harvest.
Common kale pests
Common pests that you may encounter on your kale include:
- cabbage loopers,
- flea beetles,
- harlequin beetles, and
- aphids (friggin’ aphids…).
Hand-picking these pests off of your plants can work well for cabbage loopers and harlequin beetles.
This is impossible for flea beetles and aphids. Row covers are an excellent investment and can be used to protect your plants from both early and late frosts and pests.
There are also various organic sprays and preparations that can be used for pest management.
Saving kale seeds
Kale is a biennial and will set seed in the spring of its second year of growth.
Allow plants to overwinter in your garden.
When seed pods have formed and dried, harvest full pods or the stems including the seed pods. Put the seed pods and stems in a bag, then hit the bag to allow the seeds to drop out of the pods, and into the bag.
Related Questions
Is kale a perennial?
Kale is a biennial plant. Biennial plants put down roots and grow leaves in their first year of life. In their second year, they flower and set seed before dying. There are some plant breeders working on perennial kale varieties, and seeds for some of these are available for purchase
Can I grow kale from cuttings?
Kale can be grown from cuttings by taking a cutting of a small healthy leaf just above the leaf node. Cut at a 45° angle and place stem in a pot of prepared soil. Keep well-watered and in indirect sunlight until roots develop, which may happen within three weeks.
How do you grow kale indoors?
Kale can be grown indoors if you can mimic the light and temperature requirements of an outdoor setting. Unobstructed south-facing windows or grow lights and adequate warmth will provide the light and heat needed. Proper water level will need to be closely monitored and provided for.