What is hydroponics? What are different hydroponics systems? Hydroponics has the potential to change the way we grow food. Increasingly, it’s not just commercial farmers asking these questions, but growers in homes, garages, backyards and classrooms.
Hydroponics is a method of growing plants without soil. Plants obtain nutrients from a solution of water & minerals. Common methods include: wick, deep water culture, Kratky, ebb & flow, & nutrient film technique (NFT). Hydroponic systems are used from home-based to large commercial operations.
Hydroponics is a big topic with many branches to explore. There are different types of hydroponics systems, and scales for these systems vary from the commercial to the DIY home garden. We’ll also look at the “big picture”, and also give you a simple DIY hydroponic project to get started.
What is hydroponics?
The first time I saw the word “hydroponics” I was at a farmers’ market here in northern Ontario. A farmer was selling lettuce proudly advertised as “hydroponic” lettuce, claiming it was better-tasting than plain old lettuce.
I was intrigued, and the great thing about farmers’ markets is that you can actually pose questions to the person that grew your food.
He told me that it was lettuce grown in water.
That sounded … weird. It was hard for my brain to come up with an image for that.
The word itself, hydroponics, sounded a little too tech-heavy for a local farmers’ market. Certainly, I thought, it was too complex for my gardening skills.
A general definition of hydroponics is that it is a method of growing plants without soil.
Instead of soil, the roots sit in a different material – whether that’s air, water, or some kind of solid material. Instead of getting nutrients from soil, plants get nutrients from a solution of water and minerals.
According to some sources, “true hydroponics” is growing plants in water only. (Hydro = water, of course.)
Other types of hydroponics, which use other materials as well, are sometimes called “soilless cultures.”
However, they are often referred to under the umbrella of hydroponics.
Hydroponics is sometimes called nutrient-solution culture, gravel culture (a specific type of aggregate), nutriculture or water culture.
Advantages of hydroponics
There are many advantages to a hydroponics garden, from the commercial to the personal level.
No weeding
Yup, no weeding.
Just like it’s hard to separate dirt from the idea of gardening, it’s also hard to imagine gardening without weeding. But it’s true – no weeding required.
What are you going to do with all that extra time?
No pests
Okay, this one is not as cut and dry as it originally sounds.
While reliable sources tout the “free of pests” claim to get people on board with hydroponics, other sources add a bit more to that optimistic picture.
Yes, most of the time hydroponic gardens have fewer pests.
On a small scale at home, pests are less likely to trouble a hydroponic garden. However, because there aren’t the normal “environmental checks” and biodiversity inherent in healthy soil, hydroponic gardens – especially large commercial ones – can be more vulnerable to specific pests.
To reduce the risk, research specific pests typical for the crop you want to grow.
No soil diseases
Some of the worst diseases that can infect a garden are ones that spread through the soil.
They are much harder to isolate and get rid of. With soilless gardening, you don’t have to worry about the diseases that spread through soil because…there is no soil.
No concerns about soil quality, minerals, structure, or pollution
A significant portion of most gardening books and magazine articles spend time talking about soil.
How to build up soil quality and structure, how to test your type of soil, how to add minerals to soil or diagnose which nutrients are lacking, how to be careful of any soil pollution, how to monitor soil acidity
All of these are important aspects of traditional gardening. The literal foundation of growing plants successfully.
Hydroponic gardening simply wipes these questions away.
No soil, no soil to worry about.
As strange as it seems, you can be an avid gardener and forget about composting, earthworms and mulch completely.
You can live in a place where the soil is completely ill-suited to agriculture, and still see your plants thrive.
No concerns about landscape
Hydroponic gardening is not tied to the soil, and it is also not tied to the landscape.
For this reason, hydroponics has huge potential to open up regions that are otherwise considered useless for agriculture.
For example, vertical hydroponic gardens can be used in mountain areas that are too steep for traditional farming.
Maximize land use
Hydroponics can make the most of regions with “useless” soil, as mentioned above, but it can also maximize highly valued land.
In areas where the cost of land has sky-rocketed, hydroponics can be a viable solution; this method of gardening can produce high density crop yields.
With growing populations and exploding urbanization, cities around the world are starting to pay attention to hydroponics.
Hydroponics has immense potential for urban areas that have lots of mouths to feed and little space to do it with.
No surface watering
Gardening with no weeding, no composting, and no watering?
Sounds bizarre. But it’s true. Surface watering, that is.
You still need to ensure that there is water getting to the roots of the plants. With some hydroponics systems, it is easy to travel and leave your garden; it is able to stay “watered” for periods of time without any hands-on maintenance.
Flexible
As I’ve mentioned already, hydroponics is flexible.
There are different types and different systems. Hydroponics can be done on a commercial level, or it can literally be done in a plastic tub in your backyard.
It can also be done inside or outside.
If you’re interested in hydroponics, you can start small – just a little experiment – and then add to your project in the future.
Uses less water
In a hydroponic garden, there is less water and nutrient waste than in a traditional garden. For regions of the world that are short on water, hydroponics can be a game-changer.
In fact, hydroponic systems often use only 10% as much water as traditional growing methods.
Higher crop yields
Studies have shown that hydroponics can produce higher crop yields than other techniques.
For example, research has demonstrated that drip irrigation can reduce water consumption by 60% while increasing crop yields by 90%.
That’s nearly double the yield with only half as much water. Crazy incredible!
Interesting project
As I mentioned already, the first place I ever heard of hydroponics was at a local farmers’ market.
The second place I heard of hydroponics was in the classroom.
As a supply teacher, I’ve seen beautiful, clean, and space-efficient hydroponic gardens in both elementary classrooms and high school labs.
If you’re a teacher, or if you have children at home, or even if you’re just curious to do a little experiment, hydroponics is a fascinating project.
There are many different experiments you can do in a hydroponic garden.
Since your plants are completely dependent on the nutrient solution you provide them with, you can fiddle with different nutrient levels and observe the results. In a hydroponic garden it is much easier to isolate the effects of one nutrient, as you are able to control the plant’s diet entirely.
All year long
Hydroponics is not tied to soil, not tied to landscape, and it’s not tied to climate.
Hydroponics can easily be done inside.
Those beautiful classroom gardens I saw? They were green and thriving, in the middle of a frigid Canadian winter.
How does a hydroponics system work?
Good question.
Essentially, a hydroponic system feeds growing plants through a nutrient solution.
Instead of getting water and nutrients from the soil, plant roots get what they need from nutrients dissolved in water.
In many hydroponic systems, plant roots are simply grown in this watery mixture.
In other hydroponic systems, a solid substance – called aggregate – gives the plant roots physical support.
In the most advanced form of hydroponics, called aeroponics, plant roots are suspended in air and misted with a nutrient solution.
Hydroponic systems are very flexible.
They can be small, simple and cheap; later in this article, I’ll explain a DIY project you can start with using inexpensive and ordinary materials.
Hydroponic systems can also be built on a commercial scale, relying on complex technology and expensive materials.
There are many different types of hydroponic systems, and we’ll explore them in more detail.
All of them, however, meet a plants’ basic needs without the use of soil.
What plants can grow in hydroponic gardens?
You can grow many different types of flowers, herbs, fruits and vegetables hydroponically.
Technically, you can grow anything hydroponically.
However, some plants are better suited than others. Some will thrive in a hydroponic setting, while others will never reach their full potential.
Some of the easiest and most popular plants to grow hydroponically are:
- lettuce
- peppers
- spinach
- cucumber
- tomatoes
- basil
- berries
- chives
- beans
- kale
If you look up beginner and DIY level hydroponic gardens, you’ll almost always see lettuce used as the plant of choice.
Plants like tomatoes and peppers are higher maintenance, requiring the care of a more experienced hydroponic gardener.
Because hydroponic systems can be more costly on a commercial level – especially if temperature is being regulated – many hydroponic farmers focus only on plants that can get more bang for their buck.
These include:
- tomatoes
- fresh greens and herbs
- fresh specialty flowers
Is hydroponic growing faster than growing plants in soil?
Yes, many plants grow faster in a hydroponic garden than in a traditional one.
Scientists have proven that growing plants in water changes the plant roots’ structure, enabling them to take nutrients more efficiently and, as a result, grow more quickly.
Plants grown hydroponically can also give a better yield, if they have the nutrients, temperature, water and air they require.
For this reason alone, a small hydroponic garden makes a great experiment. Some sources say that plants grown hydroponically can grow up to 50% faster than plants grown traditionally. I don’t know about you, but I want to put that to the test!
For more info, you can check out a couple related articles:
Why is hydroponics important?
Hydroponics has been around for a long time, but at this point in history it is becoming increasingly important. In the context of climate change, desertification, urbanization, rising sea levels, and a growing global population (with a growing appetite), hydroponics has the potential to revolutionize food production.
Hydroponics can produce a lot of food with only a fraction of the space traditional agriculture requires; hydroponics can also produce that food in harsh climates and poor soil conditions.
Feeding the world is a pretty important thing, I’d say … Hydroponics could open up a lot of fresh possibilities.
What are the disadvantages of hydroponics?
Like anything, hydroponics has some pros & cons.
Do hydroponic vegetables taste different?
One disadvantage you might hear from skeptics is about the taste of food.
According to some, hydroponically grown food has an inferior, “watery” taste.
A 2019 study–one of the first of its kind–found that lettuce had different concentrations of sugars, glutamate, and other compounds that can affect flavor, depending on whether it was grown hydroponically or in soil.
The taste of food can change based on the nutrients in the growing medium – whether it’s water or soil.
If the right nutrients are there, vegetables grown hydroponically can taste just as good or superior to vegetables grown traditionally.
This is especially true when fresh hydroponic veggies are available in the winter — a tomato grown at a nearby hydroponic greenhouse is going to taste much better than one shipped from halfway around the world.
Hydroponics cost
Another disadvantage of hydroponics is the cost.
This all depends on what system you are choosing, what scale you’re growing on, and how mechanized the system is.
The fancier it is, the more expensive. Meanwhile, simple hydroponic systems made from regular materials can be quite cheap.
DIY tutorials for a simple bin system (more information later in this article) peg the price at only $10.
Ongoing costs can also vary.
A huge factor here is whether or not temperature is being controlled. Obviously, keeping an indoor garden warm when it’s cold outside is going to cost more money.
Are grow lights needed? That can also increase your costs, but to be fair, that would happen if you were using soil indoors as well. It’s not a cost that’s specific to hydroponic gardening.
All plants require nutrients, and hydroponic gardens require a nutrient solution, since the plants don’t have access to nutrients in a soil.
These nutrient solutions can be premixed, or mixed yourself using chemicals purchased from a gardening store – while the cost varies, and can generally be quite inexpensive, there is a cost to obtaining the nutrients you need.
Like I mentioned before, because of these costs many hydroponic farmers on the commercial level focus only on plants that can get more bang for their buck. These include:
- tomatoes
- fresh greens and herbs
- fresh specialty flowers.
Overview of hydroponic systems
“True hydroponics,” technically, refers to plants grown only in water.
However, because “hydroponics” is often used as an umbrella term for all soilless gardening, we’ll cover aggregate systems (systems that use a solid material) as well.
Water culture systems
A water culture hydroponics system is one that uses – you guessed it – water as the key growing medium.
Water culture systems can also be called liquid systems, solution culture systems or non-aggregate hydroponic systems; different sources use different terms, so don’t let that confuse you.
Advantages of a water culture system is that the roots get plenty of contact with water and the nutrients dissolved in that water.
Challenges for a water culture system are making sure roots have adequate support and get adequate oxygen.
Water system costs vary, as water systems range from the simple to the complex.
The wick system, for example, is the simplest option; the nutrient film technique would be one of the more complex.
Many of the systems require regular cleaning to avoid algae growth or clogging.
Some water culture systems require a pump, such as an aquarium pump, to aerate the water.
Aerating the water allows plants to get the oxygen that they need. A pump is required because simply stirring the water vigorously would damage the plants’ tender roots.
Pumping the air through an air stone or a mesh screen helps to break up the bubbles, keeping things gentle on those tender roots.
In some systems, plant roots dangle into the tank of nutrient solution below. In these cases, the water level must be adjusted as the roots grow. During cleaning and replacement of the nutrient solution, you have to move quickly to make sure that roots don’t dry out.
Aggregate systems
In an aggregate system, there is some kind of solid substance that gives roots an anchor. The substance, called the aggregate, does one job that soil usually does: give physical support.
Different types of aggregate include:
- Sand
- Gravel
- Wool balls
- Clay balls
- Peat
- Sawdust
- Vermiculite
- Coconut coir (made of fibers from coconut shells, in case you were wondering)
- Perlite (looks like tiny white rocks, made of mined volcanic glass)
Unlike soil, however, plants are not getting their nutrients from this material.
An aggregate system still uses a nutrient solution to feed plants.
Aggregate systems can also be called medium cultures, or be named after the specific medium used (ex: gravel culture, sand culture).
Aggregate systems are often a good starting point for hydroponics; they tend to be less expensive, easier to transplant seedlings, and provide the aeration that roots need. (That means less fussing with pumps and air stones.)
In an aggregate system, the solid material is flooded with a nutrient solution.
The plants are getting what they need from the nutrient solution, so the chemical requirements for that solution are the exact same as in a water culture system.
Over time, minerals in the water and the nutrient solution can build up on the aggregate.
Every two weeks, it’s a good idea to thoroughly flood and drain the bed with water to rinse the buildup away. Your nutrient solution should not be used any longer than two weeks, so that’s a good time to clean out your bed anyway.
Whatever aggregate you’re using, it should be kept moist.
Typically, this means you need to drench it once or twice a day with nutrient solution. Keep an eye, though; it’s better to do an extra watering than it is to have roots dry out.
Types of hydroponic systems
There are several types of hydroponics systems.
In increasing order, from simple to complex, they include:
- Wick system
- Deep water culture / Kratky method
- Ebb and flow system (also known as flood and drain system)
- Drip
- Nutrient film technique (NFT)
- Aeroponics
Wick system
A wick system does not require a pump and is one of the lower maintenance options.
Plant roots are grown in a solid substance – such as sand or rock — to keep them anchored. Beneath the growing tray, there is a reservoir holding the nutrient solution.
The nutrient-rich water solution passes up to the growing tray via pieces of string or wicks.
If using a wick system, make sure that your plant roots are getting enough oxygen, and monitor for algae growth.
Deep water culture / Kratky method
The deep water culture system and Kratky method are essentially variations of the same system.
In both systems, plant roots are suspended in a nutrient-rich water solution.
In deep water culture, air gets added to the water solution via an air pump and an air stone.
In the Kratky method, no air pump is used. Plants obtain air for their roots by leaving the roots partially outside the water solution.
The Kratky method is very simple: you only need a tray or repository for the water/nutrient solution, and a way to suspend the plant so its roots are both in the solution and exposed to air. Even a mason jar can suffice.
The Kratky method was developed by Bernard Kratky in the 1990’s and is patented–which is why it’s called the Kratky method.
If using this system, regular cleaning is required to avoid root rot.
Ebb and flow system/flood and drain
In an ebb and flow system, also called a flood and drain system, plant roots are flooded with the nutrient solution, given the chance to absorb what they need, and then the solution is drained from the growing tray. This allows the excess solution to be reused, and roots to get the air that they need.
If using this system, monitor for algae growth or technical malfunction to avoid any problems.
Drip
In a drip system, nutrient-rich water is drawn up through a pump and dispersed to individual plants via drip lines.
This system requires regular cleaning to avoid algae growth and clogging.
Nutrient film technique
The nutrient film technique involves plants growing in a tray that is tilted, with one end of the tray being higher than the other.
Water flows from the high end of the tray to the low end, draining back into a reservoir below.
A pump carries water from the reservoir back up to the higher end of the growing tray.
This continual flow of water ensures that plant roots get the nutrients, water and air that they need.
This is the most common method of commercial hydroponic agriculture.
When using this method, clean regularly to avoid clogging. Monitor carefully for any technical malfunctions.
Aeroponics
This is the most advanced form of hydroponics.
In aeroponics systems, plant roots are dangling in air. Aeroponics systems still make use of nutrient solutions, and use mists as way to “feed” the roots.
Aeroponics systems are the most complex and tech-intense form of hydroponics. They supply plants with plenty of oxygen, allow nutrient solution to be re-used, and are space-efficient.
However, they use pumps to mist the roots, and those pumps can easily become clogged.
They are also not conducive to bulkier organic-based nutrients, as they’re more likely to clog the pumps.
Aeroponics is fascinating, but aeroponics systems are time-intensive and prone to technical malfunctions.
For the average home gardener, aeroponics is not the place to start exploring soilless gardening.
History of hydroponics
Really, hydroponics – plants growing in water — has been going on in the ocean since the beginning of time.
And human-orchestrated hydroponics dates back to ancient times as well.
The famous Hanging Gardens of Babylon, one of the seven wonders of the ancient world, is believed to be an early example of hydroponic gardening. Somehow – likely using a pulley system and river water – beautiful lush gardens were grown in an arid desert environment.
In 1699, English scientist Woodward was scratching his head, trying to determine if soil or water was responsible for plant growth.
In 1860, a German botanist named Julius Sachs figured it out and set the foundation for modern hydroponics. He isolated what really makes plants grow – the nutrients found in soil, not the soil itself – and proved that, if given the correct formula of nutrients, plants could grow without soil.
Since this original “nutrient solution” formula, scientist have added other micro- and macro-nutrients to improve plant growth.
In the 1930s, an American scientist took these concepts and expanded their application.
Dr. W.E. Gericke showed how hydroponic technology could be used to grow large amounts of crops.
In the decades following World War II, interest in commercial hydroponics rose and fell depending on the fluctuating prices for heating and cooling systems.
Modern hydroponics
A lot of our current hydroponics technology was actually developed by NASA to use in space.
Now, research is being done to determine how to grow food using hydroponics on Mars.
If hydroponics can enable food to be grown in harsh regions of the world, what about regions beyond this world?
In 2015, astronauts ate space-grown veggies for the first time. If you weren’t already interested in a little hydroponics experiment, surely that little tidbit will intrigue you …
Just in case you are ever in a far-flung region of the universe, you should figure out how to grow food without soil now.
Vertical farms
Vertical farms are a blossoming area of hydroponics. Using hydroponics technology, vertical farms grow levels of plants in an indoor, controlled environment.
Instead of trucking food in from miles (or continents) away, vertical farming allows fresh food to be grown close to consumers.
The largest vertical farm exists in Dubai; it is incredibly efficient in its use of water and space, with a goal of producing 6,000 pounds of food per day.
Vertical farms are complex and expensive but for a city in the desert, vertical farming can be the key to local food production.
Hydroponics: farming of the future?
The United Nations guesses that the global population will hit 10 billion in the year 2050. As developing countries advance economically, more and more people want to eat (or over-eat) like the West has been doing for years.
More and more people keep being added, but the Earth’s land and resources are finite.
Actually, in some ways the Earth’s space and resources are reducing – desertification and rising sea levels are actually erasing land suitable for agriculture.
The effects of climate change – flooding, irregular seasons, temperature fluctuations, and droughts – are also doing damage.
There is already a need for more sustainable food production, and that demand is just going to grow. Already, hydroponics is addressing some of these issues.
The UN’s Food and Agriculture Organization is currently developing large-scale hydroponics projects in regions with chronic food shortages in Africa and Latin America.
Hydroponics can help meet these food shortages and also provide new local business opportunities.
Communities with a sagging economy can adopt hydroponics as a potential new industry, no matter the limitations of their space, soil or climate.
Hydroponics can be done ANYWHERE
Hydroponics doesn’t even need land at all. That really opens things up, since most of the Earth’s surface is not land.
In fact, some creative folks have designed floating hydroponic gardens.
These could turn the ocean into a surface to grow food, helping feed coastal cities around the world with growing populations.
Suddenly, rising sea levels that are gobbling up arable land could be transformed into arable land.
These are exciting developments.
But could hydroponics really be the farming of the future? Will vertical farms ever “tower” over conventional farming (pardon the pun)?
Maybe.
To get there, experts say that there needs to be improvements to existing technology.
These improvements need to help level the playing field, making hydroponically-grown crops cost-competitive with traditional crops.
Governments need to recognize the potential of hydroponics agriculture and invest in its development.
While hydroponics may never surpass traditional farming, one Harvard article speculates that it at least has the power “to break the paradigm of food production.”
Hydroponics at home
“Breaking the paradigm of food production…”
That’s some big-picture stuff.
But, yes, you can actually undertake hydroponics at home.
The same basic concepts that allow vertical farms to rise out of the desert, or fresh lettuce to be grown in space, can be done in your kitchen or backyard.
Requirements for plant growth
What do plants need to grow? Some elementary answers might list soil as one of those things, but as we know, that’s not accurate. (Just ask German Julius Sachs.)
All plants need: correct temperature, water, light, air, mineral nutrients.
All plants need these things, whether they’re grown hydroponically or not.
When you’re growing hydroponically, you’re removing the soil, so you need to make sure you add in the nutrients and oxygen that plants typically get through the soil.
The right temperature
Not too hot, not too cold. While there is a general range, the optimal temperature depends on the type of plant.
Cool-season crops require a range of 50-70 degrees Fahrenheit, while warm-season plants do well in the 60-80 degree range.
Water
To maintain cell pressure and turgor (so plants can stand up).
Water is also needed for chemical reactions–both for photosynthesis, as well as the myriad other chemical reactions inside cells.
Light
Plants need access to sunlight, or light from grow lamps.
The amount of light required once again depends on the plant – some plants soak up as much sun as they can, while others prefer some shade.
And, yes, LED lights can indeed be used for growing plants.
If using grow lights, you need to make sure that the intensity of the light required does not raise the temperature beyond the plants’ ideal range. Find out how far lights should be from plants.
Oxygen and carbon dioxide
Plants need air – specifically, oxygen and carbon dioxide.
Carbon dioxide is usually taken in through a plants’ leaves, while oxygen is typically found in the soil.
To make sure plants are getting enough oxygen, it can be necessary to “bubble” the solution used by adding air to it.
Mineral nutrients
Plants don’t need soil, they need the nutrients found in soil.
These nutrients are taken in through the plant’s roots.
According to a Texas A&M University article, “The minerals required in relatively large amounts [for plant growth] are nitrogen, potassium, phosphorus, calcium, magnesium, and sulfur. Those required in small amounts are iron, manganese, boron, zinc, and copper.”
Requirements for all growing media
If plants get what they need, they can grow in water, various solid materials, or even air.
Whatever you grow your plants in, you will need to make sure that you meet the following requirements on this list, per the University of Arizona, growing media must have:
- Sufficient support for the plants: This will depend on what kind of plants you are growing. Taller, heavier plants will require more physical support.
- Enough air, since plants require oxygen and carbon dioxide
- Maximum water availability for the plant roots
- Accessible nutrient solution with consistent chemical characteristics
Nutrient solutions
Nutrient solutions are vital to a successful hydroponic operation, no matter how small it is.
You’re removing soil, so this is the step where you give your plant what soil usually provides.
The water you mix your solution with will have its own mineral content.
Generally, this content is so low that plants will not be harmed by it or they may actually use it as supplementary minerals.
To be extra safe, you can use purified water, water from a dehumidifier, or rainwater.
You can also use tap water, but add the precaution of using a filter on the hose to minimize some of the chemicals passing through.
Yes, it can seem complicated.
But remember – nutrients in soil can get complicated even with traditional composting.
Testing pH levels, checking what type of soil you have, adding minerals needed when your plants start showing symptoms of a deficit, and brewing compost “tea” are all things that you don’t need to worry about for your hydroponics garden.
Also remember: it doesn’t have to get that complicated.
The route I recommend for the home gardener – in terms of hassle and cost – is to buy a pre-mixed nutrient solution.
Pre-mixed chemicals
This is the easiest and, for home use, likely the most cost-effective route.
Plants require many different minerals, and to make your own solution of chemicals requires you to find and buy small amounts of many different chemicals.
You’ll need a sensitive scale to measure chemicals by the gram. Instead, a pre-mixed solution has everything your plants require, and in the correct amounts.
Pre-mixed solutions can be found at gardening stores and in catalogues.
You should always follow the specific instructions given, and keep in mind that a little can go a long way.
Self-mixed chemicals
Ah … you’re the DIY type.
Maybe your plants have specific requirements that require you to do some fiddling with the pre-mixed recipes.
Maybe you’re interested in a larger-scale operation, in which case mixing your own chemicals might be worth the effort and more cost-effective.
Dr. D.R. Hoagland of the University of California devised “the Hoagland solution,” a pretty reliable recipe for mixing your own chemicals. A variation of the original 1950 paper containing “the Hoagland solution” can be found here.
You can start your search for chemicals at garden supply stores and drug stores.
Some “fertilizer grade” chemicals, especially the cheaper ones, may have more impurities. These are usually harmless, but beware.
If you mix your own solution, it’s a good idea to check the pH level of the solution before you use it.
The numbers of the pH scale are from 0-14, with 7 being neutral. The lower the number, the higher the acidity. The higher the number, the higher the alkalinity.
Most plants thrive in the range of 5.5 – 6.5 acidity, but there are a few that prefer an even more acidic environment.
Azaleas, for example, thrive between 4.5 and 5.5 on the pH scale.
A simple way to discover the pH level is to use a kit that includes an indicator paper that will change colors based on the acidity. (Does this ring any bells from high school science?)
To increase acidity, sulfuric acid or phosphoric acid can be added drop by drop.
A safer alternative is to use vinegar, which is far less acidic than sulfuric acid, and thus safer to handle.
To decrease acidity, raising the pH level, potassium hydroxide can be added.
Once you’ve mixed your solution, be sure to store it in an airtight container.
If you allow other materials to get in, you’re changing the recipe.
If you allow a lot of water to evaporate, sodium levels may become more concentrated and, as a result, detrimental to your plants.
Starting off – seeds or seedlings?
If you’re using an aggregate system, you can put seeds directly into the aggregate.
Don’t plant them too deep, and be sure that the surface of the planting bed doesn’t dry out.
Once the seeds germinate, you can start using nutrient solution.
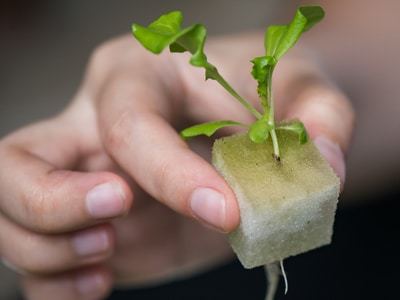
You can start seedlings in a hydroponic net pot (a small pot that holds the plant suspended, but allows roots to dangle out) by using a perlite and peat moss mixture.
Use 80% perlite, 20% peat moss, and make sure the substance is moist.
Plant 2-4 seeds in each pot, and thin out to just one seedling as they germinate and grow.
A more reliable method, however, is to transplant seedlings.
Seedlings should not be started in soil; the soil on their roots can contaminate your nutrient solution, or cause the roots to rot. Instead, use a soilless growing medium.
Plant seeds in a bed or tray using a soilless aggregate.
Plant seeds in rows, and transplant the strongest seedlings to your hydroponic system. Put one seedling into each net pot.
Gardeners can choose to keep some plants in their hydroponic system as their permanent home, or start plants in a hydroponic system but then transition them to soil.
Tomatoes, for example, can be started in a small at-home hydroponic system indoors in early spring, and then young plants can be transplanted outside.
Troubleshooting
Like all gardening, hydroponic gardens are prone to problems that you need to look out for.
A bit of prevention can go a long way.
Some potential problems are specific to hydroponic systems. As mentioned above, certain systems might be prone to clogging, algae growth, or technical malfunction.
Other problems are typical of all gardening.
Guarding against disease and disease spread is important, particularly for commercial operations.
Hydroponic systems can be less likely to spread disease, because soil diseases are not present, but they can be more vulnerable to other types of diseases as they lack the natural biodiversity found in soil.
Research possible diseases for the specific crop that you are growing. No matter what you’re growing, general precautions to prevent the start and spread of disease are:
- Proper plant spacing
- Proper cleaning
- Immediate removal of diseased plants
As with any garden, plants growing in a hydroponic garden may show symptoms of nutrient deficiency.
In a hydroponic garden, plants don’t have access to any nutrients other than the ones you provide.
If you notice signs of a nutrient deficiency, you need to take action to get your plants what they need.
Also, you need to keep in mind how often you should change the water in your hydroponic system.
General signs of nutrient deficiency
General signs of nutrient deficiency include:
| Problem | Cause |
| Stunted Growth | This Can Be Difficult To Detect, As It Is Slower And More Subtle Than Other Signs Of Nutrient Deficiency. Can Indicate A Phosphorous Or Potassium Deficiency. |
| Loss Of Green Color (Chlorosis) | Yellowing Of Leaves Is Often A Sign Of Nitrogen Deficiency. Darkening Of Leaves, Or Shades Of Red/Purple Can Be A Sign Of Phosphorous Deficiency. Loss Of Green Color At The Edges Of Leaves, But Not In The Center, Can Indicate A Potassium Deficiency. Loss Of Green Color On A Leaf, But Not The Veins Of The Leaf, Can Indicate A Magnesium Or Iron Deficiency. |
| Dying Plant Tissue (Necrosis) | This May Look Like Dry, Papery Brown Parts Of A Leaf Or Dark Spots On Fruit. Crispy Areas On The Edges Of New Leaves, Or “Blossom End Rot” In Fruits, Can Indicate A Calcium Deficiency. |
Certain plants need different levels of nutrients. Some plants are naturally deficient in one nutrient or another. Research the needs of your specific crop, especially if you run into any of the symptoms listed above.
DIY starter project: hydroponic bins using the Kratky method
Overview: using the Kratky method
The Kratky Method is a “passive” hydroponics system that is a great starting point for beginners.
In this system, nutrient solution is measured once into a tank or tub. Seedlings are held up in “rafts,” with their roots free to reach downward into the nutrient solution.
The space between the surface of the nutrient solution and the seedlings allows roots to get the air that they need.
As plants grow, and the longer their roots get, water level of the nutrient solution is lowered.
This happens naturally; water evaporates, and plants take up water.
This keeps the roots able to reach the nutrient solution, but not sitting submerged in it.
Roots above the water level will take in air that the plant needs, and roots below the water level will take in water and nutrients.
Tips & tricks for using the Kratky method
Keeping the bins on the ground will help control the water temperature; when temperatures drop at night, the warmth of the ground will moderate the change.
It’s also important to control the water level, so that you don’t dilute your nutrient solution or drown your plants.
Bins can be placed indoors or outdoors, but keeping them sheltered from the rain helps avoid this problem.
Another thing to watch out for: uneven ground.
If the ground below your bin is uneven, the water levels inside it will be sloped.
That means plant roots will be soaked on one end, and drying out on the other.
When plants are harvested, new solution can be added and a fresh crop of transplants started.
After 3-5 cycles, the tub should be cleaned.
Advantages of the Kratky method
The Kratky method is well-suited to plants with a fast turnaround time.
A variety of plants can be grown via the Kratky method, but for your starter project it’s best to play it safe.
Plants like tomatoes or peppers are best reserved for more experienced hydroponic gardeners.
For beginners, lettuce is a great crop to start with.
A major bonus of the Kratky method is that it is low on materials.
If earlier parts of the article mentioning things like air pumps, mesh filters, air stones, and drip lines make you feel stressed, relax.
The Kratky method requires none of those.
To start with, you can get most of what you need just by looking around your house.
This makes the Kratky method ideal for a home or classroom experiment.
Using the Kratky method, your DIY hydroponics system will literally be a container with holes drilled in the lid, pots nestled in those holes, and a nutrient solution inside.
Materials needed
Net cups
These are planting pots with a rim that allows them to hang suspended from the holes you will drill, and with spaces to allow plant roots to dangle out of the pot.
These are inexpensive and can be found at a hydroponics store or online.
You need one net cup per plant.
Bins
These are used to hold the nutrient solution.
Many different types of containers can be successful – plastic tubs, mason jars, coffee cans.
The size of the bin depends on what you are growing.
To start with lettuce, you need at least 5 inches of depth. Net pots should be about six inches apart.
Lid or cover
An easy choice here is to simply use a bin that already has a lid.
This will give a snug fit, making spills or contamination less likely, and you simply cut the holes for your net pots directly into the lid.
You can also make a lid out of another material, such as Styrofoam. You can cut holes into a sheet of material and lay it across one bin or multiple bins.
Small drill and 2 inch hole bit
The size of the bit needs to allow the net cup to be suspended, not fall through into the solution below.
Technically, a sharp knife can also do the trick depending on what you’re using as your lid. (Be careful!)
Nutrient solution
If you’re doing multiple bins, it’s best to mix your nutrient solution all at once in a large pail. That way, if you need to fiddle with the recipe, you only need to do it once and you ensure that the solution is the same for each bin.
For an at-home project, buying a pre-mixed nutrient solution is the way to go. Less time, less money, and less hassle.
You can mix your nutrient solution with purified water, water from a dehumidifier or regular tap water.
If you are using tap water, you might want to use a filter over your hose to reduce levels of chlorine.
Rainwater is another excellent alternative, as it doesn’t have any added minerals or chemicals.
Grow lights (optional)
You might be thinking, Oh, no! Now it’s getting complicated! No, it’s not! These are optional, but I do want to mention them.
If you’re growing your plants indoors, you might need grow lights. You can buy grow lights to match the size of your bins and suspend them above.
Here’s a good overview of grow light types for indoor use.
Table (optional)
Another optional material is a table to keep your bins on, whether indoors or outdoors.
How to set up a Kratky hydroponic system
To get started, set your net cups on the lid and think about how far apart you need them to be to accommodate the plants you are growing.
Once you decide on the layout you need, drill a hole in the lid and double-check that the net pots you have fit in the hole without falling through.
Once you’re sure that you’ve got the sizing right, drill the rest of the holes.
Mix your nutrient solution. Pour it into the bin, keeping at least an inch between the surface of the water and the lid to allow some air flow.
Put your lid on the bin and insert your net pots.
The bottom of the net pots should make contact with the water’s surface, so you can top up the nutrient solution until that happens.
Put the lid on the bin, insert one net cup, and continue adding nutrient solution through another hole until you see the solution starting to come up into the inserted net cup.
Transplant seedlings into the net pots or plant your seeds directly.
If you plant seeds directly, you’ll need an aggregate substance in the net pots.
If you’re transplanting seedlings, put the seedling, still in its aggregate material, into the net pot.
Press the aggregate material gently to ensure that roots are reaching the bottom of the pot.
Insert net pots into the lid of your bin and watch your plants grow at an amazing rate!
Summing up: Get growing!
There you have it, folks!
A brief introduction to the world of hydroponics.
Whether you are interested in commercial farming, elegant classroom gardens, or a simple plastic tub in your kitchen, hydroponics has the fascinating potential to reinvent how we grow food.
I hope you learned something here, and I hope you are inspired to explore a new way to garden. It is still gardening, even if there’s isn’t any dirt under your fingernails.