There are many handy tools you can incorporate into your year-round greenhouse, and these advances are only increasing as greenhouse gardening becomes more popular. Seedling heat mats are great for greenhouse gardening in colder temperatures. Seedling heat mats can help with germination and growth as you move into the winter months!
To use a seedling heat mat, put your seedling pots or trays on top of the heat mat, plug the mat into its thermostat, and turn it on. Keep the seedling heat mat on, even overnight, since seeds sprout faster when they’re consistently warm. How long to use a heat mat depends on each plant species.
Why use a seedling heat mat?
Seedling heat mats are great if you want to grow plants in the winter from seeds.
Because the winter obviously doesn’t offer as much warmth as the summer months do, adding a heat mat can imitate the warmth that’s naturally present in the summer.
Think of it as an incubator for plants—just like eggs need warmth to hatch, plants will grow more quickly and healthily with warmth.
Heat mats have been found to cut germination periods in half, which is significant, especially if you want to plant several cycles’ worth of produce!
It bears mentioning that you can grow plants successfully in the winter without a heat mat. A heat mat isn’t a necessary tool, but it’s been shown to increase germination and overall growth of plants. So, using a heat mat is a great option if you’re trying to grow your plants quickly and overall get more of them at a time.
Heat mats are also inexpensive and easy to find at gardening or home improvement stores. For a small investment that you can use year after year, many gardeners find heat mats to be well worth it.
How to use a seedling heat mat
As with any gardening venture, the best place to start is with a good plan.
The setup
Heat mats come in different sizes, so before you go out to the store, you’ll want to have an idea of how many plants you’ll want, how big they are, and what kinds of trays or pots you’ll plant them in.
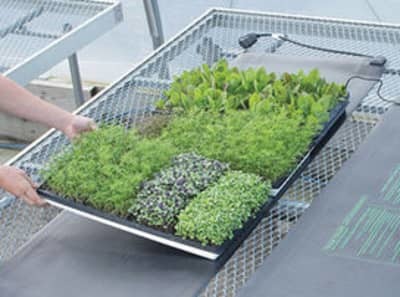
After you’ve bought your heat mats and planted your seeds, place your pots or trays on top of the heat mat. Then, plug the mat into the heat control thermostat box (if you have one), which will plug into the wall. If you don’t have a thermostat, you’ll plug the mat into the wall.
Once the heating mat is on, it should stay on constantly until the seeds have sprouted. It’s a misconception that you should turn the heat mat off overnight. Your seeds will sprout more quickly when they have that consistent bottom warmth.

Keeping things warm and monitoring your seedlings
It’s good to use plants that grow best in similar conditions on your heat mat. That way, the plants will all thrive with similar levels of heating and you won’t have to worry about regulating the heat mat.
For example, plants that thrive in cold weather won’t need as much bottom heat as those that thrive in warm weather.
If you plan to use a variety of plants that thrive at different temperatures, it’s a good idea to either buy multiple seedling heat mats. Or, you could elect to only use a heat mat for those plants that germinate at warmer temperatures.
Your seedling packages will provide information about the ideal germination temperature. It’s good to check that out, and use that info to help you plan what should go where.
In general, most seedlings are going to thrive with consistent bottom heat between 65 and 75 degrees. So, keep in mind that there’s a range here, and you’ll be successful as long as your plants’ germination temperatures are similar.
Keeping an eye on your seedlings
Okay, now your pots and trays are happily sitting on the heat mat and you’ve regulated the heat.
Next, you’ll want to keep an eye on your plants, because once the seedlings sprout, it’s important to turn the heat mat off and store it for the next planting cycle.
The heat mat will not help after the seeds have sprouted, and the extra heat may even hurt the plants. They may grow more rapidly, but they’ll be weaker, and you may even see disease due to overheating.
Because seedlings germinate at different rates, you’ll likely remove some plants before others. This is why it’s important to keep a close eye on your seedlings and remove them as soon after sprouting as possible. Don’t worry if some seedlings are sprouting before others–that’s completely natural!
Recommended features for heat mats
As with any tool, there are heat mats that have more advanced features than others. There are a few things you should look for when you’re buying your heat mat.
The first, and maybe most important, is that your heat mat is waterproof. Your plants will, of course, need water, and it’s important that the heat mat can come in contact with water without breaking. This allows you to keep the heat mat on all the time, which is important for germination.
As I mentioned earlier, seedling heat mats come in various sizes, and you’ll want the mat to be a sufficient size to fit your seedling trays and/or pots.
The more you know about what you want your setup to look like before you go shopping, the better. You don’t want to invest in something that’s too small or takes up too much space, and you can save yourself a trip back to the store by planning ahead.
Lastly, it’s a great idea to buy a thermostat for your seedling heat mat. This will do the regulating for you, but it will also alert you to any problems that might be occurring with your heat mat.
Without a thermostat, it’ll be harder to regulate your heat mat’s temperature, which really just means more work for you. You’d probably save about $10 if you bought a heat mat without a thermostat, but there are so many benefits to having one that this is typically worth it for greenhouse gardeners.
Safety Precautions
The main safety precaution with heat mats has to do with overheating. The easiest way to prevent this is to invest in that thermostat.
If you decide to opt out of the thermostat, your heat mat will most likely have a safety shut off feature that turns the mat off. Typically, the thermostat will turn the heat mat off when it heats to over 10 degrees above the room temperature. As heat mats have improved, the need to worry about overheating has decreased quite a bit!
Another major safety precaution is making sure that the heat mat wiring doesn’t come in contact with water. Even with a waterproof mat, you’ll need to watch out for this. As long as you’re careful, this should be an easy precaution to take!
Ideally, your heat mat’s cord will be long enough to reach an outlet. Using an extension cord is NOT recommended. But if you do need an extension cord, make sure it’s a heavy-duty grounded extension cord, and that you either plug it into to a surge protector or a GFI outlet.

Seedling Care
Using seedling heat mats will definitely help with the germination process, and many greenhouse gardeners are thrilled with the results.
That being said, keeping the plants warm isn’t the only thing you’ll need to do. Keep in mind as you’re putting together your greenhouse supplies that your seedlings also have access to the necessary amount of light (sunlight or grow light), oxygen, and water.
When you heat the soil from underneath, you may find out that it dries out more quickly, and your plants may need more water than expected. So, keep a close eye on how moist/damp the soil is, and water as needed–seedlings can dry out fast!
You’ll also need to monitor the temperature of the greenhouse regardless of whether you use heat mats or not. The mat will provide bottom warmth, but plants still need the warmth of their surrounding environment in order to grow properly.
Alternatives to heat mats
If heat mats aren’t in the cards for you this time around, never fear! You can still provide bottom warmth for your plants.
One great way to do this is by placing them on a surface in your home that is warmer–for example, on top of the fridge or TV, or in a warmer part of the greenhouse.
There are also several ways to make a DIY heat mat, but the materials would likely cost as much as a fully-constructed and definitely reliable heat mat, so this isn’t recommended. Besides, a heat mat that you purchase will have been thoroughly tested to ensure its waterproof and meets electrical safety requirements.
Also not recommended is using an electric blanket or heating pad. Many people do use these as seedling heat pads, and that’s their choice–but it’s a risky choice. These materials aren’t designed to be turned on 24/7, and they’re also not waterproof. If you have the ability to steer clear of using a heating pad or electric blanket, please do! You don’t want to risk starting a fire in the middle of the night.
Related Questions
How hot is too hot for seed germination?
Each plant has a specific temperature range at which it germinates, so this is a tricky question to answer. Generally, plants thrive somewhere between 70 and 90 degrees Fahrenheit. You’ll likely see a germination delay with temperatures significantly below or above that range. That’s not to say plants absolutely can’t grow in more extreme temperatures. They just won’t grow as quickly or as healthily. The best thing you can do is re-create the plant’s native environment–it’s more likely to germinate when its surroundings are similar to its natural habitat.
What’s the difference between a heat mat and a grow light?
If you’re planning to grow in a greenhouse year-round or at least in the colder months, you’d be wise to invest in both grow lights and heat mats. The main difference is that grow lights emulate direct sunshine and allow plants to undergo photosynthesis. Heat mats, on the other hand, heat the soil from below and enhance the germination process. If you had to pick one, grow lights are probably the more necessary of the two, but I’d recommend getting both if you can!
When should I start my seedlings?
Like lots of gardening topics, this widely depends. Each plant has a different germination period and different conditions under which it’ll thrive. So, it’s good to look into that when you’re choosing what to plant. To make your life easier, even in a greenhouse, you should plant things according to the weather conditions that are best for them. For example, starting a seedling in the winter that thrives in the summer isn’t impossible. But it means you’re going to have to do a lot more work to simulate a summer environment in your greenhouse for that plant.