Imagine a dystopia where you can only grow one type of plant for the rest of your life. It’s tragic, yes, but there’s a clear and undeniable winner: the humble potato. There are so many different ways to serve potatoes, so you’ll never be bored with them! Plus, they’re super easy to grow. Let’s dive in!
To grow potatoes:
- Cut potatoes into pieces having at least 2 eyes.
- Plant these seed potatoes 6-8 weeks before the last frost, when soil temperature is 50°F (10°C).
- Space potatoes 12-14 inches apart, in a trench 6 inches wide & 8 inches deep. Cover with 3-4 inches of soil.
- When shoots are 8-10 inches tall, mound 3-5 inches of soil around the stem.
- Potatoes prefer full sun & well-drained soil.
- Harvest potatoes 2-3 weeks after the foliage has died back.
If the thought of homemade potatoes in their roasted, mashed, baked, or even French-fry form has your mouth watering, get ready to add potatoes to your garden.

Background Info & Fun Facts
As you may already know, potatoes are root vegetables
. Unlike many plants, potatoes aren’t typically grown from regular seeds, but from seed potatoes which have buds, or eyes, on them.
Potatoes grown from their true seed aren’t identical to the parent plant, so they aren’t always useful.
Not every plant has such an interesting history as the potato.
They are native to South America and made their way into European diets around the late 1500s during the Columbian exchange.
But, believe it or not, they weren’t exactly welcomed with open arms right away.
In 1700s France, one guy, Antoine-Augustin Parmentier, worked hard to make potatoes popular.
Most of France’s population thought of potatoes as disease-causing and gross. Parmentier set up a trick to get rid of this stigma.
He got a big plot of land–granted by King Louis XVI–planted a bunch of potatoes and hired pretend guards around it.
Secretly, Parmentier told the guards to allow people to steal potatoes and even accept bribes.
This ploy eventually worked by making the potatoes seem valuable, and they became the food for the revolutionaries!
As for the future of potatoes, maybe they will be grown on Mars someday à la Mark Watney.
In 1995, potatoes became the first food ever grown in space–so you shouldn’t worry too much about your garden being homey enough for them.
They aren’t too particular.
See the most common potato pests & how to prevent them.
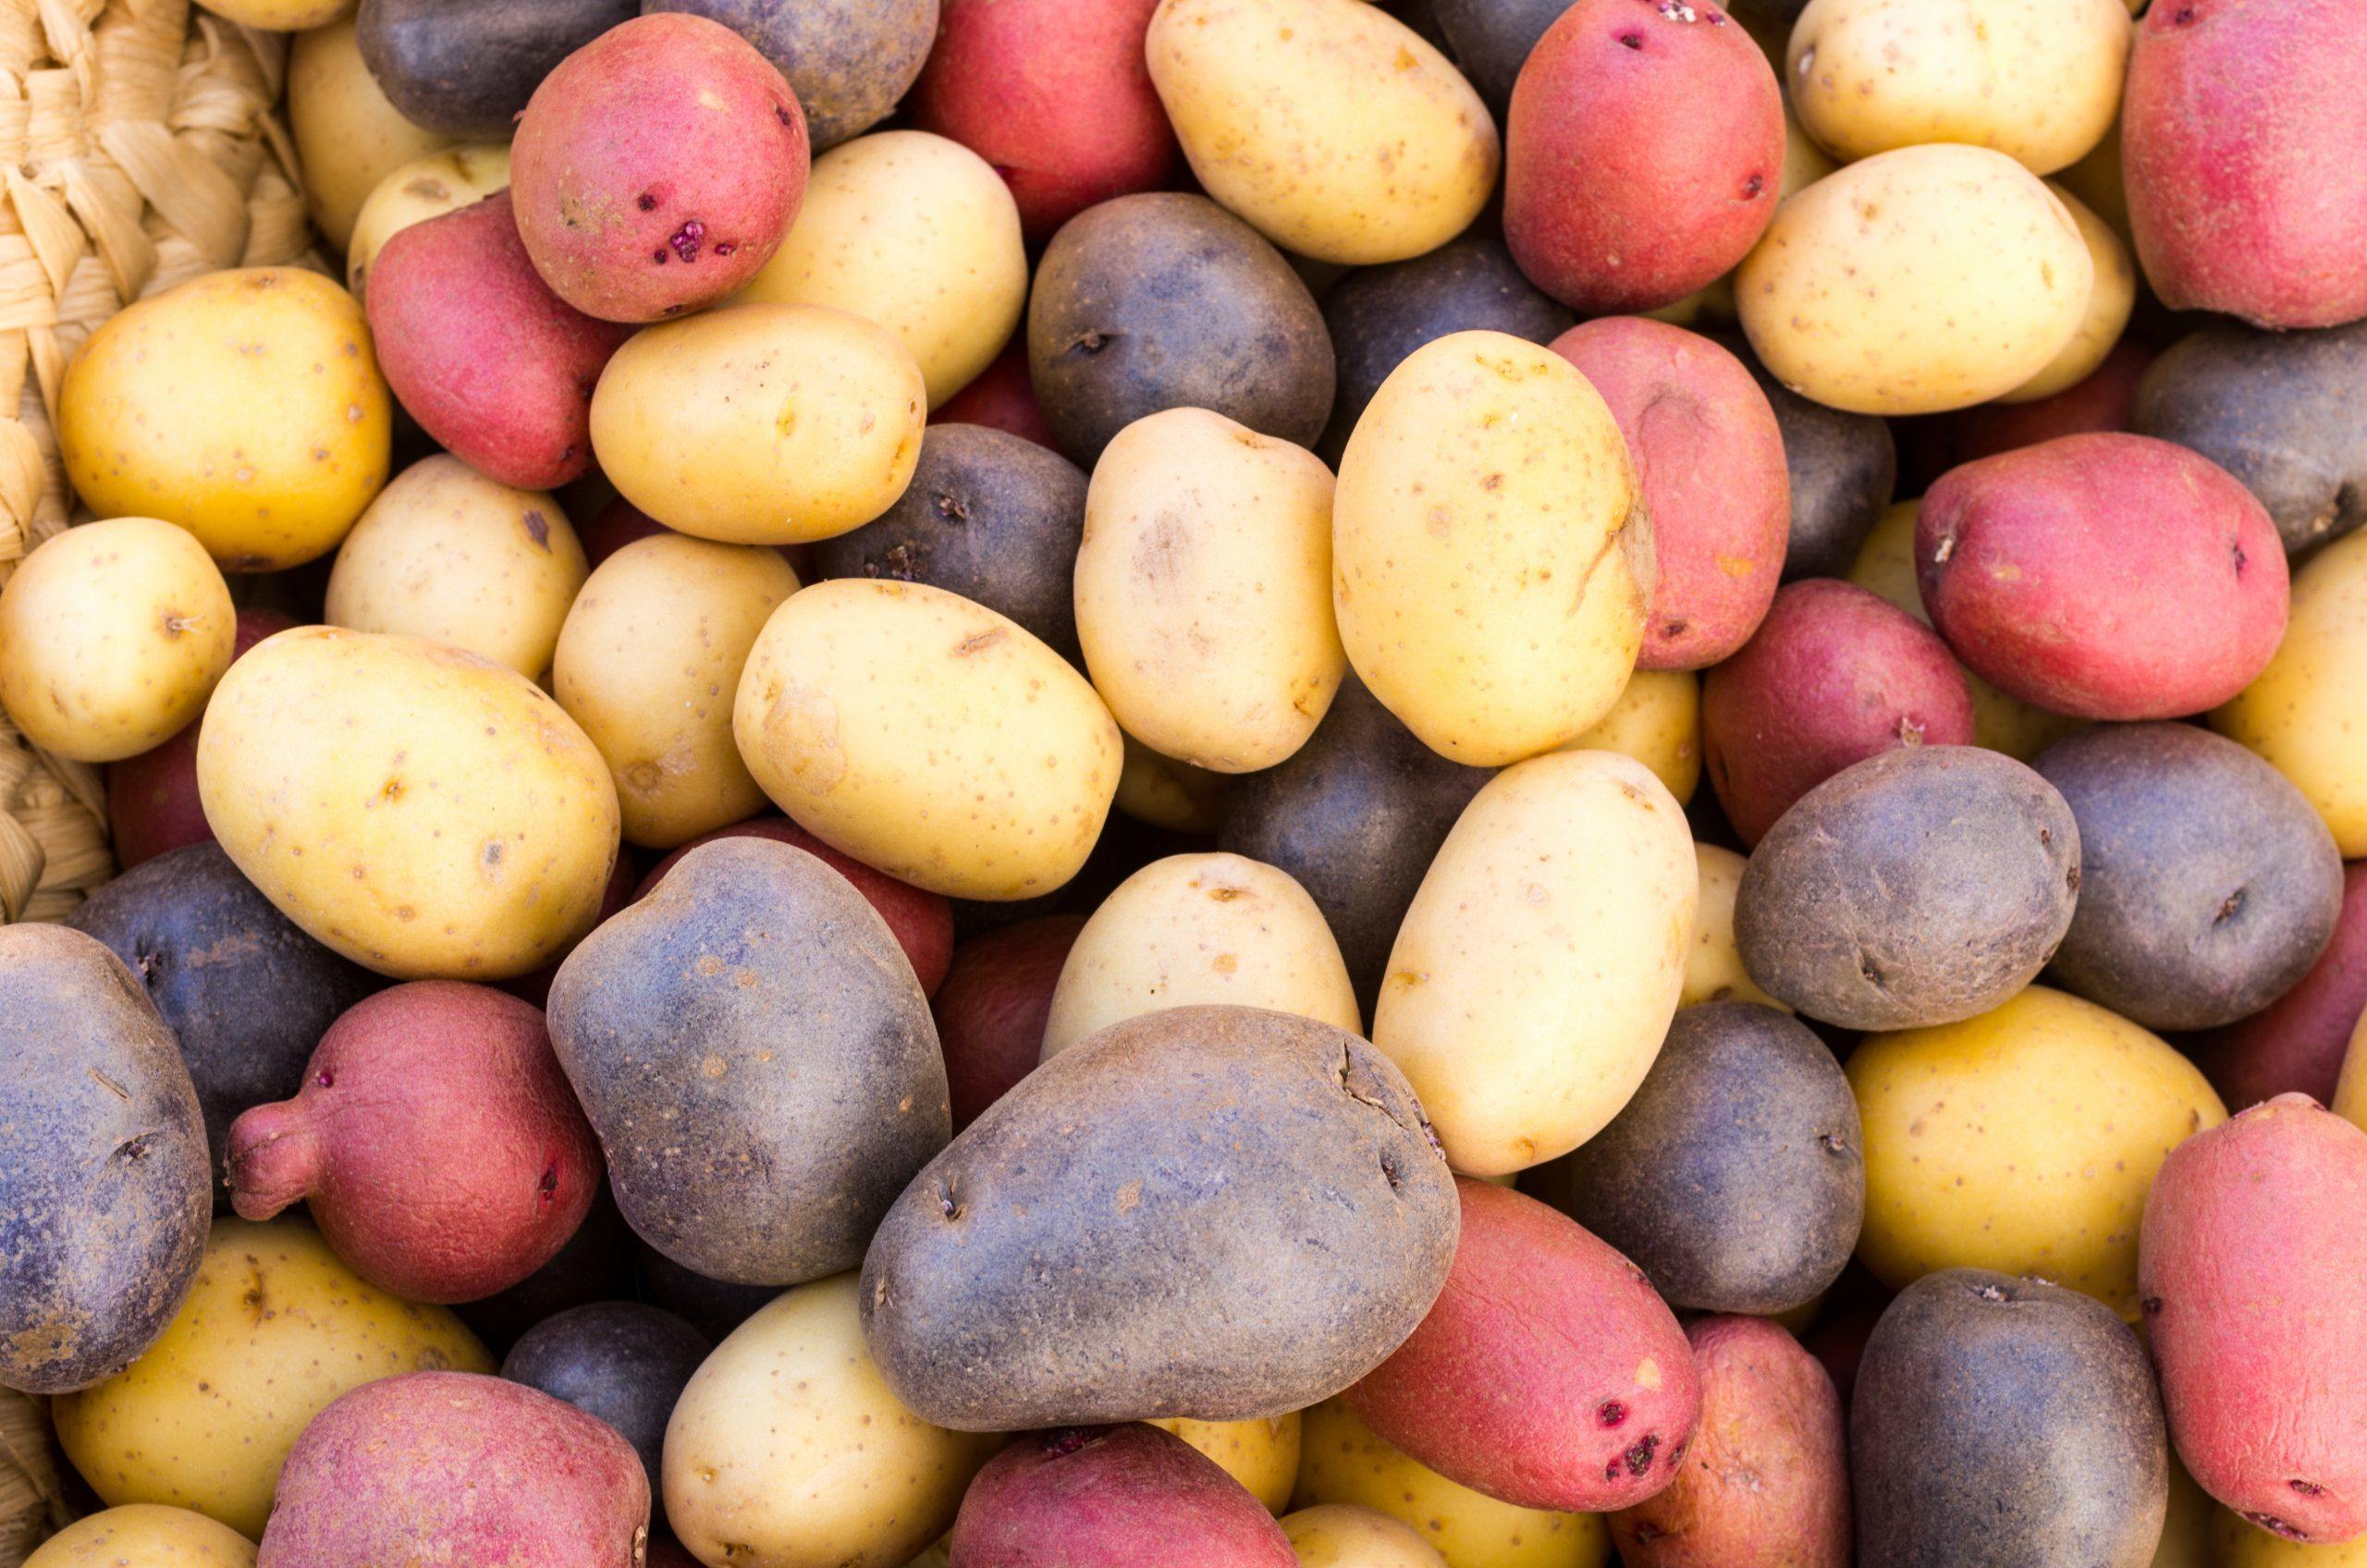
Potato Varieties
So, how can you possibly choose which variety to grow of the 5000 kinds in the world right now?
There are a few ways to approach this question.
See the growth stages of potatoes.
Culinary Needs
While potatoes have tremendous potential for variety, it may be worth considering the most likely way you’ll be enjoying them first.
If you’re primarily going to be making baked potatoes, for instance, you’ll want a variety that gets fluffy on the inside and crispy on the outside.
Russets would likely be the best for this job. For this same reason, russets also work great for mashed potatoes.
However, if you know you’ll be using the potatoes more in dishes like stews, where it would be ideal for them to keep their shape somewhat, waxy varieties would be a bit better.
You may opt for Yukon Gold potatoes.
In addition to texture and firmness, flavor also varies slightly between different types of potatoes.
Red-skinned, white-skinned, russets, and others have unique tastes.
Experiment with what you like!
That’s part of the fun of gardening.
Again, this isn’t a hard rule, and whatever potato variety you choose will work across many types of dishes, but a little research into their culinary behaviors may help you out later on.
Environmental Restrictions
Even though potatoes are hardy and relatively easy to grow, climate and environmental conditions are always a factor in gardening and shouldn’t be ignored when picking your variety.
Check the USDA plant zone and minimum temperature needed for the variety you want to grow, or to get ideas about which one to pick.
If you live somewhere with particularly wet soil or mostly clay soil, you can account for those specifications by choosing a potato variety that’s better at dealing with those conditions, such as the dark red norland or red chieftain.
For dryer, sandy areas, you’ll want to pick a variety that could potentially withstand a bit more drought, like the rose finn apple or reba varieties.
Generally, potatoes are more prone to disease when grown in wet, clay soil, being that they are root vegetables.
So, if that’s the soil type you’re dealing with and you’d prefer to grow a variety that isn’t very good at dealing with that condition, you can still do that by growing them in a container.
We’ll cover those options soon.
Timing & Maturity
Another way to choose your variety is by checking out when the harvest time is.
There are a few categories that potatoes fall into describing how long it takes for them to reach maturity.
This might be helpful if you’re short on garden space, because potatoes that reach maturity sooner are also smaller.
The self-explanatory category “first earlies” comes, you know, first.
They’re ready to harvest around the start of summer.
Second earlies come shortly after, only a couple weeks later.
Some of the potato varieties in these early categories are Irish Cobbler, Red Norland, and Superior potatoes.
Maincrop potatoes are larger; they include varieties like Gold Rush, Chieftain, and Cranberry Red.
And finally the stragglers: some late-season varieties are Elba, Kennebec, and Russian Banana potatoes – which do indeed have a fun banana shape to them.
And, find out how much sunlight potatoes need to grow.
Propagation Methods

Tubers
By far, the most common method of potato propagation is by using the tubers.
Potato tubers have several nodes, or eyes, which grow sprouts when they are planted during spring.
They go through a period of dormancy, allowing for storage, and are planted when they are ready to grow for the next season.
From the new sprouts, the stems grow, followed by other shoots that branch off, and then the new tubers.
This propagation method is also known as vegetative reproduction.
Unlike a normal seed, which is a product of pollination, vegetative reproduction creates exact genetic copies, so there’s more uniformity and often higher yields.
On the downside, disease, from blight-causing mold or viral infection, can sometimes be a problem with this method.
So, when you’re looking for seed potatoes, make sure that they have the magic words on the packaging before you buy them: certified disease-free.
This guarantee is super important.
Bad seed potatoes might not just mean your hopes of abundant and yummy homemade potato dishes are squashed (or mashed?) for the time being.
The diseases could spread and become a persisting issue in your garden.
True Seeds
You may have already seen potatoes start to sprout when they’ve been in your kitchen a little too long.
That’s because the potatoes really don’t need soil to start growing, they just need a bit of moisture and the right temperature, which your kitchen might be providing.
If you’ve seen that, it probably doesn’t seem too strange that potatoes aren’t normally grown from a true seed, but from tubers.
But, as a matter of fact, there are true seeds that can be used!
Occasionally, potato plants will produce true fruit. It looks kind of like a small, green tomato.
These contain the seed – there’s not really anything to be done with the potato fruit (don’t try to eat it).
Now, if you see these on potatoes you’re growing from tubers, the seeds might be sketchy.
If you’re interested in growing potatoes from true seeds, it’d be best to buy the seeds themselves.
Again, make sure they are certified disease-free and get them locally if possible.
Although this method isn’t as common, there are still many pros to growing potatoes this way.
The seeds won’t grow genetically identical to the parent plant, so you can experiment with the diversity.
Some of the yield will likely be very bad-tasting.
But others won’t!
Another major benefit to using true seeds is that it allows for potato growth in places where it would otherwise not be possible.
In climates that aren’t so favorable for growing potatoes, it’s a lot easier to start by using seeds that were made somewhere with better conditions.
If you’re opting for this propagation method, start the seeds indoors during the winter, then transfer to soil outside 6-8 weeks later.
Tissue Culture
Another somewhat-strange way to propagate potatoes is with tissue culture.
In this method, plantlets are placed in a liquid nutrient-filled medium. 3-9 weeks later, the plantlets are cut at the nodes, and these new cuttings get their own container and medium to grow in.
This process continues, effectively making many, many, plantlets to finish growing in a sterile soil to produce the tubers.
These tubers are then usually sold.
When you buy certified disease-free seed potatoes, they were likely grown this way.
Set-Up Options
In case you haven’t noticed, the theme of growing potatoes is “choose your own adventure.”
If all these options are starting to seem a little overwhelming, fear not.
While you will have to make decisions about all these things – the variety to grow, the propagation method, the set-up, which yummy meals to make with the potatoes – you also can’t really go wrong.
But this way you’ll have all the information you need to get growing.
Hilled Rows
In each of these methods, we’ll assume that seed potatoes are being used – not the true seeds.
The first method is hilled rows. It’s also called the trench and hill method.
Yeah, you get the gist from the name.
This is a very common method and has been used on a large scale for a long time. It works best when you have a fair amount of space.
Trenches
To start, you’ll dig trenches about 2-3 feet apart, making sure that the weeds are gone and that the trenches are about 4-6 inches deep all the way across.
Let the soil pile up in between the trenches as you dig – you’ll use it to cover the plants later.
Fertilizer
Next up: fertilizer. Add compost and fertilizer at the bottom of the trench and get it properly mixed into the soil.
Now, you’re ready to add the seed potatoes (each about 1 foot apart) and cover with about 4 inches of soil.
Water thoroughly, and you’re done for the day.
Keep adding soil
As the plants grow, you’ll need to continuously add soil from the mounds between your trenches to cover the new growth.
Wait until the shoots are about 6 inches tall, then start gently adding the soil around the stems.
You can use a hoe, shovel, or your own hands, but if you’re using tools be extra careful.
Mound enough that there are only a few leaves sticking out of the soil.
Repeat this process periodically, until Potato Mountain is at least 1 foot tall.
That’s all that needs to be done but continue to check that all the tubers are covered, or else they’ll turn a sickly green.
If you’d like to take another step for the sake of precaution, add mulch after it’s reached 1 foot tall.
This will keep the weeds smothered and ensure that the tubers aren’t being exposed to direct sunlight.
But another major pro of this set-up is that you don’t need anything more than your hands, the seed potatoes, and the soil.
And, well, the space.

Raised Beds
So, if you don’t have quite enough space for long trenches and potato mountains, consider growing in a raised bed.
This process is quite similar to the hilled rows but doesn’t require quite as much digging or space.
Plus, many gardeners have found that the harvest from this type was greater and the potatoes themselves had grown larger than when using the hilled rows method.
Once you have the raised bed set up for the size that you’d like to use – it should be at least 3 feet by 3 feet – you can get started.
The bed needs to be at least 1 foot deep and located somewhere there will be, at minimum, 4 hours of clear sunlight each day.
Fill about halfway with planter mix and compost, then add in the fertilizer so it’s incorporated well.
Plant the seed potatoes 3-4 inches deep, and 12 inches apart. If you’re really short on space, 8 inches apart should be fine.
Plant in parallel rows.
Add water and watch the growth. In this case, when the plants are 6-8 inches tall, you can follow the hilled rows method and start piling the soil into mounds, or simply add mulch.
If you want, you can start with hilled rows and add the mulch later.
Either way, leave about 4 inches of the top part uncovered by soil or mulch.
Generally, smaller potato varieties are better for this limited amount of space, but it’s not at all uncommon for this method to result in large potatoes at the harvest.
Wire Cylinders, Grow Bags, & Other Containers
And, finally, the miscellaneous.
If you don’t want, need, or have space for the trenches or even a raised bed, know that you can use just about any container to grow potatoes in, and make amendments as necessary.
Wire cylinder
One such type of container is the wire cylinder.
You can create your own by getting the wire mesh, shaping it into a cylinder with the dimensions you’d like, and holding it together with a zip tie, or you can buy one that’s already put together.
Like always, make sure you’re picking a spot that gets plenty of sun.
To get started, dig a hole around 6 inches deep with roughly the same diameter as your cylinder, and push the cylinder into it.
If the stability of the structure seems more leaning-tower-of-Pisa than pyramids-of-Giza, consider getting some wire stakes to hold it firm.
Next, line the bottom and sides with moist newspaper or mulch.
This will help keep the good stuff – the soil, the tubers, the right amount of water – in, and the bad stuff – pests and outside soil – out.
After that, you mostly just follow the same steps as the methods from before.
Add about 6 inches of soil, compost, the seed potatoes (spaced at least 4 inches apart), 3 more inches of soil, and water.
Scoop more soil on top as the plants grow.
When you’re ready to harvest, simply pull the cylinder up and dig for the potatoes.
And save the cylinder for next year!
Grow bag
Using a grow bag is virtually the same process, though you won’t need to line with newspaper or mulch.
After topping off the seed potatoes, plant the bag itself much like the wire cylinder, and fold the top of the bag down to form a cuff.
As the plants grow and more soil is added, unroll the top.
Using raised beds, wire cylinders, grow bags, or any other container helps to maximize yield while minimizing space, but another key advantage is that it allows you to get a growing medium specifically for this purpose.
If the soil on your property is dense, wet, or high in pH, you only have to get enough for these containers instead of going through the tedium of altering an abundance of soil.
Getting Started
Alright, by this point, you have decided the kind of potato variety you want to grow, how you want to grow it, and the set-up/container you’ll use.
What else do you need to do before planting?
Gather all materials.
This includes your certified disease-free seed potatoes, compost, fertilizer, anything you might need for the set-up you’ve chosen (wire, grow bag, etc.), and the soil you’ll use if the soil on your property isn’t suitable.
Then, choose your location.
Somewhere with good drainage and a minimum of 4 hours of unobstructed sunlight each day, though 6-8 would be better.
Soil
If you’re not buying a soil mix specifically for growing the potatoes, you’ll want to check the characteristics of the soil you’re using to make sure it will work well.
Potatoes do best in loose, sandy soil with a pH from 5.0 to 7.0.
You can easily test the pH of your soil with a cheap test kit and make sure you’re in that range.
If it turns out that your soil is too basic (and not because it likes to wear Ugg boots and order pumpkin spice lattes), you can lower it quickly by using compounds like phosphates, sulfur, etc.
These all have varying strengths and times needed to work.
The better options are also the ones which take longer: ammonium fertilizers and good old-fashioned organic matter.
Because these can take a couple months, it’s good to check the pH earlier rather than later.

Prepping the seeds
Now, time to prep the seeds.
Seed potatoes have buds, or eyes, which is where the sprout forms.
You don’t want to plant an entire seed potato if it’s too large or has a lot of eyes because it will get overcrowded.
You also don’t want one that’s too small, or it will result in a weak plant.
Cut the larger seed potatoes into pieces weighing about 1.5-2 ounces, ensuring that each has at least one good eye.
Do this a few days before you plant them so they can heal, which prevents rot.
Store the seeds in a warm area and allow them to get exposed to a little bit of light.
This will break the dormancy and they’ll start sprouting.
Plant!
Now you can finally plant!
Place them in the soil with the eyes facing upward, following the directions specific to the method you’ve picked.
You can plant any time in between February and April for the first round, just wait until the last frost has passed.
The second crop can be planted in July or August and harvested as late as possible.
Make sure the potatoes won’t experience temperatures under 40°F or above 85°F during tuber formation.
Maintenance
The maintenance required for growing potatoes is simple.
Remember to cover with soil regularly so they don’t get burnt and turn green.
They need about 1 inch of water each week as they grow, so water consistently.
As the temperatures peak in summer, you may need to water as often as every day.
A drip irrigation system is best.
You’ll also have to remove weeds.
If you pull them out, be very careful that you don’t accidentally grab part of the plant and rip that up with the weed.
Or just add enough mulch to smother the weeds.
Lastly, if you want a high yield, add light, regular applications of fertilizer.
Pests & Diseases
Unfortunately, there will always be bugs who think all parts of your potato plants are as delicious as you do.
Watch for signs of them, as well as potential diseases.
Hopefully you can avoid them altogether.
Colorado Potato Beetle
You might find these small, yellow, black-striped bugs feasting on the leaves of your potato plants.
They can cause a lot of damage very quickly, so you’ll need to keep an eye out for them and act fast.
If they show up, you’ll likely have to use insecticide.
Be careful, though, because they tend to build up immunity when sprayed year after year.
The best way to prevent these bugs is by rotating the crop you’re using in that area.
Swap potatoes for a non-host of the CPBs and they should leave you alone.
Aphids
Annoying aphids are not special predators of potatoes, but their sap-sucking behavior harms potatoes, too.
These little bugs hang out on the underside of the leaf, making them difficult to spot at first.
When there are enough of them on the plant, you’ll see the effects.
Usually the leaves get light green spots on them and then start curling inward. By this point, the tubers may already be severely affected.
The best way to deal with aphids is by acting preemptively.
Ladybugs are a natural predator of aphids, which is lucky because, if you’re like me, they’re the only kind of bug that is tolerable.
I mean, some parasitic wasps are also predators of aphids, but you probably don’t want to introduce those to your garden.
They might disrupt the tranquility.
Avoid using harsh insecticides for aphids, because doing so would also negatively affect the predators of aphids, and you want to keep those around.
Late Blight
Blight is such a common and devastating problem for potato growing, it’s beyond infamous.
Recall, the Irish Potato Famine?
Yep, that was blight’s doing.
There isn’t a lot that can be done to prevent blight, but good practice is making sure that there’s proper drainage and that you’re not overwatering.
Blight is mostly a matter of the weather conditions favoring its growth. It usually starts when it’s been cool and excessively humid and rainy.
You’ll see blight in the form of dark green spots on the foliage.
These spots soon turn black and enlarge, and a white fuzz will appear.
The foliage isn’t the only region affected. Blight also infects the tubers themselves.
So, if you find blight on your potatoes, it might be the weather or that blight had been surviving on the tubers planted.
Again, it’s so important to buy from a good source.
Blight will kill the whole plant if you let it.
Fungicide, especially copper fungicide, is the best way to get rid of it.
Cut off affected foliage, too.
Harvesting
Like we talked about earlier, different varieties of potatoes mature at different times.
First earlies: 75 days.
Second earlies: 90.
Maincrop: 110.
Late season: 135-160.
But if you don’t want to count the days and weeks, you can use your eyes to get a good enough estimate.
Earlies are ready to be dug up when the tops have started dying down.
These should be used immediately instead of going into storage, because smaller potatoes tend to dry up quickly even in good storage conditions.
Maincrop potatoes should be dug up 2-3 weeks after the tops have completely died.
When they’re ready, carefully dig them up and try not to make many cuts.
The skins will be fragile at this point.
Leave them out to dry on the top of the soil for about 30 minutes and dust off the soil by hand.
Gently collect them in a bin and marvel at your bounty!
Storage
If kept in the proper conditions, potatoes can be stored for quite a long time.
To start the storage process, you first need to cure the tubers.
After harvesting, place in an area that stays between 50-60°F, and with a high humidity level, for 2-3 weeks.
During this time the skin will thicken and minor lesions will heal.
There are a few exceptions to what can be stored.
First, don’t store the varieties that fall in the early category.
For maincrop varieties, check for cuts or bruises after the curing process, and don’t store injured tubers.
The rest can be stored.
Place them in a cool, dark place.
Don’t put them into the refrigerator – the cold will active the response to convert starches to sugars.
Also, don’t wash the potatoes before storing, simply brush off excess soil and wash when you’re ready to use them.
If, by chance, the tubers start to sprout, cut the sprout off.
If it’s still firm, it’s fine to eat.
However, if you find any tubers that are wrinkled or have green skin, throw them out.
This isn’t a Dr. Seuss book.
In these conditions, with the temperature staying consistently at or under 45°F, your potatoes can last up to 8 months in storage.
So you shouldn’t need to worry about too many potato-based meals happening too quickly (as if someone could get sick of potatoes).
Lastly, in case you were considering using the stored potatoes as the starters for the next year’s potato growth, you should know that’s probably not a good idea.
Avoiding re-use of the potatoes mitigates the likelihood of diseases.
Start fresh each year.
Maybe try a new variety!

Tips & Tricks
Here’s a quick overview and a few extra things to keep in mind in order to have a successful yield:
Plant in an area that gets 4+ hours of sunlight daily.
Loose, sandy, and slightly acidic soil is the best.
If that doesn’t describe the soil on your land, consider buying soil that matches the requirements.
Rotate the garden yearly to prevent nutrient loss and to keep away the bugs that feast on potatoes.
Add fertilizer in small amounts regularly throughout the growing season.
Plant the potatoes further apart to make sure there’s plenty of room for them to grow a wide root system and to make weeding easier.
Or, add mulch to smother the weeds.
Do the hilling in the morning. As the day goes on and the sun beats down, the above-soil part will start to droop.
To avoid hilling or topping off the soil, plant 8-9 inches deep from the start.
If any flowers appear on the foliage, carefully remove them.
They’ll drain energy away from the root system needlessly.
Related Questions
How do you grow potatoes from a potato?
To grow potatoes, use a clean, disinfected knife and cut larger potatoes, making sure that each cut piece has at least one good eye on it.
If the potato you’re using is relatively small, don’t worry about cutting.
Give the pieces a few days to recover from the cut and then plant, with the eyes pointing up.
Can I grow potatoes from store-bought potatoes?
Store-bought potatoes are often sprayed with an inhibitor that keeps it from sprouting.
Even if the potatoes do sprout, remember that you need to use certified disease-free seed potatoes, or you might end up with a big problem in your garden.
How long do potatoes take to grow?
Each variety falls into a category with its unique maturation time: first earlies, second earlies, maincrop, and late season.
First earlies should be ready for harvest about 75 days after planting. 90 days for second earlies, 110 for maincrop, and 135-160 for late season.