How to grow more tomatoes per plant is a question many gardeners ask. You’re travelling a well-trodden path, & there’s a lot of information out there. Tomatoes are one of the most popular edible plants to grow–there’s nothing quite like the taste of a garden-fresh, sun-warmed tomato.
To grow more tomatoes, research recommends:
- Plant transplants 3-4 inches deep, so the soil is up to the cotyledons. This enhances plant growth & fruit production.
- When planting, insert a stake 12 inches into the ground to minimize damage to the roots.
- Within 2 weeks after planting, maintain soil moisture so that plant roots become well established.
- When tomato plants reach 8-12 inches, prune all suckers below the first cluster of flowers.
- Above the first flower cluster, let suckers grow 2 leaves before pruning.
As I begin my garden this year, I have to admit that I wasn’t impressed with the tomatoes I harvested last year. Growing more tomatoes per plant is something that I want to see happen this year. I don’t know about you, but I’m interested in gardening smarter, not harder. So, let’s review the research and, come summer, enjoy the fruits of our labor!
Tomato varieties
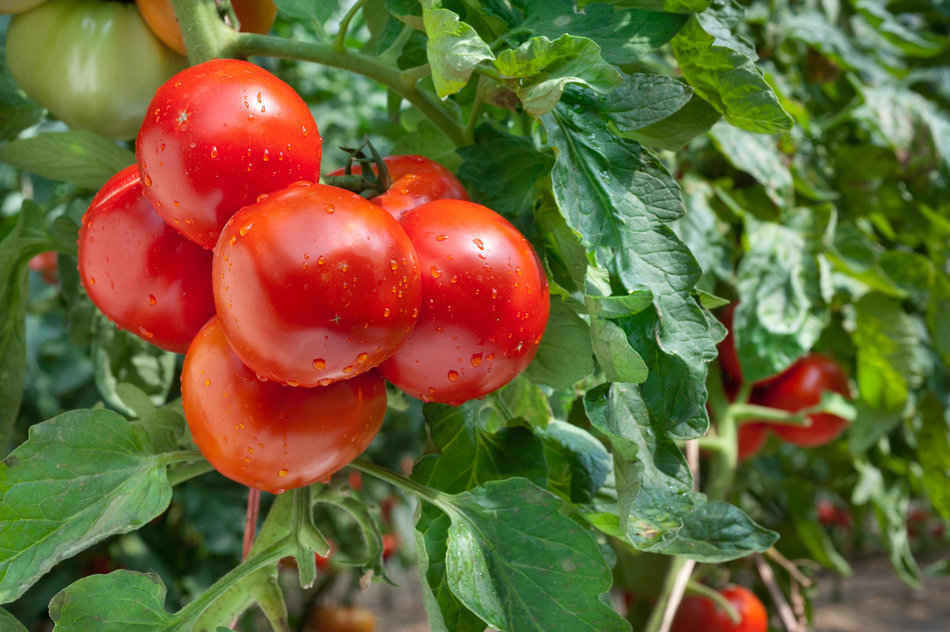
Like I mentioned, tomatoes are popular. Tomatoes are a staple for many family meals, at least in my house. They’re a versatile fruit, with many varieties suited to different purposes. Before you begin gardening, think through what you will use your tomatoes for, and which types grow best in your climate, before you begin seed shopping.
Best tomato varieties for eating fresh
If you mostly plan to eat your tomatoes fresh, there are a variety of different types you can try.
Heirloom tomatoes are, just as they sound, tomatoes that grow from seeds that have been passed down from season to season. They don’t have the same shelf life or disease-resistance powers of hybrids, but they’re noted for their intense flavors.
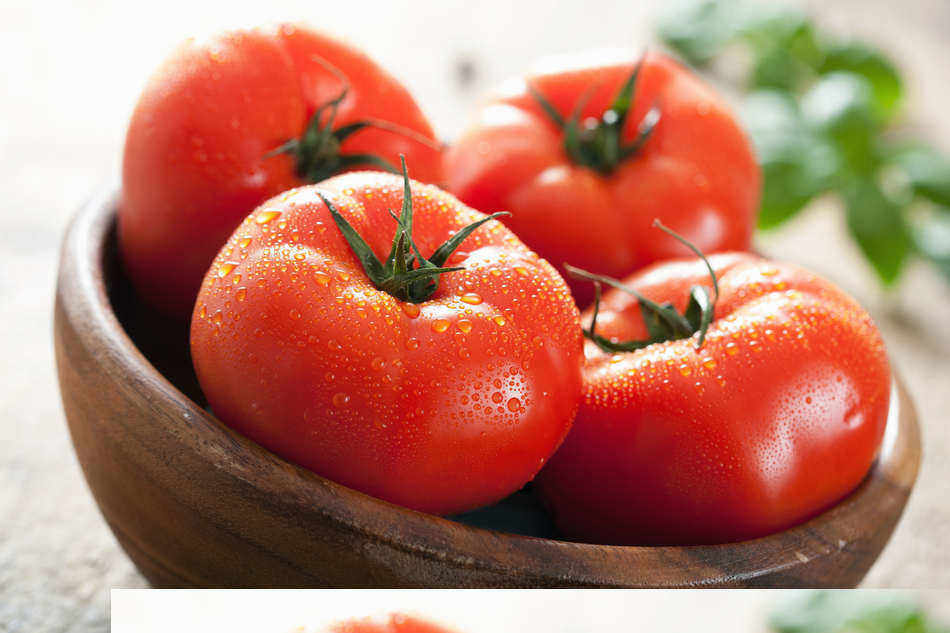
Red beefsteak tomatoes are large, juicy tomatoes that are excellent for slicing up and putting on burgers fresh off the barbecue.
Tomatoes on the vine have a fresh-from-the-garden look and taste. They’re great in salads and fresh salsas.
Cherry and grape tomatoes are small and perfect for snacking. My very first gardening attempt consisted of a container of herbs and two cherry tomato plants grown on either side of my parents’ shed. As a tomato lover, that burst of flavor from a home-grown cherry tomato got me hooked on gardening. Cherry and grape tomatoes are also great to add to main dishes, roasted vegetables and fresh salads.
Best tomato varieties for preserving
Years ago, I remember my sister-in-law simmering her first batch of tomato sauce made from fresh tomatoes.
“It was a lot of work,” she said afterward, as we all enjoyed the sauce over pasta. “I don’t know if it was worth it…”
It must have been worth it, because she made tomato sauce the next year, and the next. She just couldn’t go back.
If you’re hoping to make and preserve sauce, Roma tomatoes are the go-to variety. They’re dense, meaty tomatoes with fewer seeds and less water than other varieties. Less water means less simmering on the stove to thicken. Roasting your Roma tomatoes beforehand is a delicious way to up the flavor in your sauce.
If you’re hoping to can salsa, red or green beefsteak tomatoes may suit your needs. Red beefsteak tomatoes are a classic, and green beefsteaks can add unique and tangy flavor to your dips and salsas.
Drying tomatoes is another great way to preserve that tangy tomato flavor to enjoy all year long. It only makes sense, when drying tomatoes, to pick meaty varieties with low water content. Roma tomatoes are a good fit for this purpose; that dense, pulpy quality that makes them a good choice for thick sauce is the same feature that makes them a good choice for drying. Certain heirloom tomatoes, such as Principe Borghese, also have the ideal characteristics and superb flavor for drying. For more information on how to dry tomatoes check out this site.
Best tomato varieties for containers
Any tomato can be grown in a container, provided that the size of the container is big enough to meet the plant’s needs. There are dozens of varieties, however, that have been specifically bred for container gardening, or whose characteristics stand out as more suitable to a small space.
Indeterminate, sprawling tomato plants need large containers and require staking. This can be a challenge with limited space, although some gardeners still grow them in large containers such as big garbage cans. For most home gardeners, though, indeterminate varieties are not the best choice for containers containers smaller than 5 gallons.
There are dwarf varieties, which are very compact. Some of these, like the Window Box Roma Tomato or the Patio F Tomato, have been groomed specifically for small spaces. Some varieties, like the Tumbling Tom, are even ideal for hanging baskets. However, many gardeners don’t want to be limited to dwarf varieties; some people find the flavor of dwarf tomato fruits can be bland.
You might want to check out heirloom varieties that are container-friendly. Generally, heirloom tomatoes (those ones that are produced from seeds passed down season to season) are known for their superior taste.
Or, you might want to consider determinate tomato plants.
In the middle of the sprawling indeterminate and the squat dwarf tomato plants, you have the third option of determinate tomato varieties. These are:
- bushy and productive;
- usually don’t require staking, and
- generally do well in buckets at least 12 inches deep.
Determinate tomato varieties go well beyond cherry and grape tomatoes. You can find almost any type of tomato in a container-friendly form. Big Boy Bush and Bush Champion, for example, are popular choices if you want large, tasty tomatoes that can be grown in a small space.
Best tomatoes for your growing zone
If you’re in a colder climate, you want to look for tomatoes that ripen early. These come in all different types–heirloom or hybrid, container-friendly or not.
Sophie’s Choice–I know, weird name for a tomato (shudder…)–is a dwarf heirloom tomato that is container friendly, and also produces its flavorful crop in 55 days. Some varieties, such as New Yorker or Manitoba (both heirloom), are actually named after the places they thrive.
Depending on how cool your climate and how short your growing season, you may need use various techniques to extend your season. This often means starting seedlings indoors, covering plants to protect them from frost at the end of the harvest, or growing in a greenhouse. If you need to move plants in containers or cover them, you might want to choose from the more compact determinate varieties.
If you’re in a hot climate, start off by shopping for tomato plants or seeds that are particularly known for heat tolerance. These come in heirloom or hybrid options. Examples of heat-tolerant tomato varieties include:
- Principe Borghese,
- Indian Stripe,
- Solar Fire,
- Bush Champion and
- Sweet 100 Tomato.
You’ll also need to consider shade. Although tomatoes love sun, there’s such a thing as too much of a good thing. If there’s no shade, create some using shade cloth and a shade structure.
Other ways you will need to give your tomatoes special TLC in a hot climate is to water frequently and to mulch your plants to keep that water in the soil. For really hot weather, you may need to harvest your tomatoes slightly early, setting them in some shade or bringing them indoors to continue ripening.
What you need
Before getting into the details, here is a list of some things you will need to nurture a successful tomato harvest this year:
- Tomato seeds or seedlings
- If you’re growing tomatoes from seed, you will also need potting soil and small pots or cells to plant them indoors.
- Well drained, loamy soil
- Compost, sea soil or worm castings
- Eggshells and vinegar
- Seaweed fertilizer
- Sunlight and water
Starting tomato seeds & seedling care
Tomatoes need warm soil to germinate and thrive. In temperate climates, the soil doesn’t usually get warm enough until the middle of summer, when it’s too late in the growing season. For this reason, tomatoes are often started from seeds indoors to get a head start.
Unless your climate is warm enough to sow seeds directly into the soil, you will be faced with the choice of starting your own seeds or buying seedlings. There are pros and cons for whichever direction you take.
Buying tomato seedlings
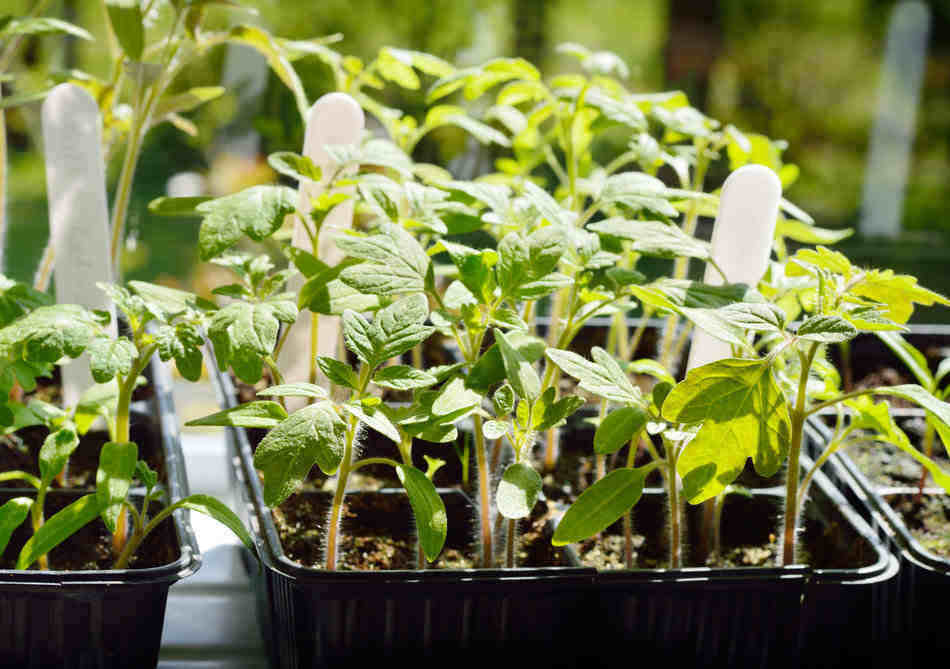
If you choose to buy seedlings, you skip the work and the cost of starting your seedlings indoors. You don’t need to plan ahead, counting back 6-8 weeks from the last frost date for your area. You can, on a whim, decide to add tomatoes to your garden! Seedlings can be bought from local greenhouses, by mail, or through gardening groups.
The downside of buying seedlings is that you don’t have the same level of control over the seeds. Some growers will be thorough about the quality and type of seeds they use; others won’t. You also need to be aware of young plants that haven’t been handled well–watch out for plants that look too big for their containers, that haven’t developed a strong root system, that look over-crowded, or have any blemishes or discoloration. Also, don’t assume that the greenhouse seedlings you buy have been hardened off properly. You want healthy, disease-free plants to start off your tomatoes.
Starting your own tomato seeds
When you start seeds yourself, seed packets usually contain way more seeds than you need. If you want to grow several different varieties, you end up having to buy many different seed packets. If you buy seedlings, however, you only buy the number of plants that you need and you can choose a selection of different varieties to try. For your specific situation, it may actually be cost-effective to just buy a few seedlings that you need, versus the materials and seeds to start your own.
If you choose to start your own seeds, a little more work and planning are required. Tomato seeds should be sown indoors 6-8 weeks before the last frost date for your area, so get out the calendar and start counting backwards to jot down when you should get started.
To start your own seeds, you can use small “cell packs” used to start small flowers and vegetable plants, but ideally a slightly larger container–a small pot or a plastic cup with holes–will allow the root systems to mature further before transplanting.
Planting tomato seeds
The ideal potting mix for tomato seeds is “soil-less” potting mix–it’s called “soil-less” because it’s actually a mix of only organic materials. Fill your containers or cells up to a half inch from the top, then set two seeds close to the center. Cover the seeds with an additional quarter inch of the mix and press down lightly with your fingers. Make sure that the soil doesn’t get dry, but don’t keep it soggy, either.
Set the plants in a window with as much direct sun as possible, keeping the seeds nice and warm. If you’re covering your containers or pots, be sure to remove your cover once the seeds sprout to avoid them getting too damp, which can cause fungal infections. If both of your seeds germinate, pinch off the weaker one. If only one germinates, that’s why you’ve planted two–insurance!
If seedlings become too big for their small pots, you may need to repot them into larger ones. In fact, repotting seedlings before putting them into the garden will help your plants get stronger and healthier before facing the elements. One seedling per pot is ideal. To avoid damaging root systems that may be tangled together, you can simply snip any weaker seedlings to narrow it down to just one plant.
Repotting tomato seedlings
When to repot tomato seedlings
Seedlings are ready to be repotted when they’re at least three inches tall and have a few sets of leaves. Water the seedlings to loosen them and to keep the roots nice and moist. Have your pots (at least 4-inch pots) ready and empty, and a quality potting mix pre-moistened.
Handling tomato seedlings when repotting
Handling the plants by their leaves, not by their delicate stems, lift them out of their existing container, allowing soil to cling to the roots. Hold the plant over the new pot, with the lowest set of leaves being level with the pot rim. Fill the pot up to the rim, shaking it a few times to let the soil settle. Water the soil until you see drainage out the bottom of the pot.
Here’s the thing about tomatoes that makes them different from many other plants, and is important to know when you’re repotting or transplanting:
- Tomatoes have the ability to grow roots directly out of their stems.
For this reason, it’s important to plant tomatoes deeply into the soil to let those roots form, giving your plant a sturdy base and better access to nutrients.
When it comes time to plant the tomatoes in the garden, first stop and do a happy dance. Yay! The weather is finally warm enough! (If you live in northern Ontario, like I do, you understand the joy of this moment.)
Hardening off tomato seedlings
Now, before you get too eager, you need to take the time to harden off your seedlings. Your little tomato plants have been pampered, comfortably removed from wind and rain and cold. They need to toughen up a bit before you can expect them to thrive in the great outdoors.
Take time to set your plants outside, in dappled sun or shade, to get them acclimatized. Start slow, setting them in a sheltered spot to begin with. Slowly increase their time outdoors and exposure to the elements, eventually leaving them out overnight. Then you can transplant them in the garden, remembering to plant them deeply into the soil to encourage roots to grow from the stem. Be sure to select a spot with full sun, keeping in mind that hours of direct sun are more advantageous than all-day sun.
Preparing the soil
Okay, pause. Rewind.
While your seedlings are growing indoors, or in the local greenhouse, prepare for their arrival by boosting up the soil content in your garden.
To till or not to till? That is the question. Tilling the garden (turning the soil) has long been considered standard gardening practice. For fresh garden spots, or particularly hard and weedy soil, tilling is usually needed.
However, many gardeners are now arguing for a no-till approach. Tilling, they claim, breaks up the natural systems within the soil, kills worms, actually brings weed seeds to the surface, and, in the long run, damages your soil. Pretty much the opposite of what you’re going for. Instead of tilling, they suggest that you cover your garden with a good layer of mulch. Different types of mulch include seedless hay, wood chips, straw, compost, or manure. Mulch is best applied in the fall. Mulch helps preserve moisture in the soil, prevents weeds, moderates soil temperature, and, depending which type of mulch you use, actually breaks down and adds organic matter to your soil.
In the spring and the fall, boost the nutrients and minerals in your soil by adding different types of organic matter to it. Sea soil, which is part fish and part forest fines (made of bark, forest soil, needles, etc) is a natural way to feed your soil. You can also add compost, either by making your own, trench composting (best done in the fall), or buying compost. And don’t forget poop. Composted manure (animal poop!) and worm castings (worm poop!) add vital nutrients and minerals; they also improve the soil texture to allow roots to grow easily, and for the soil to retain moisture.
Eggs and eggshells in your soil
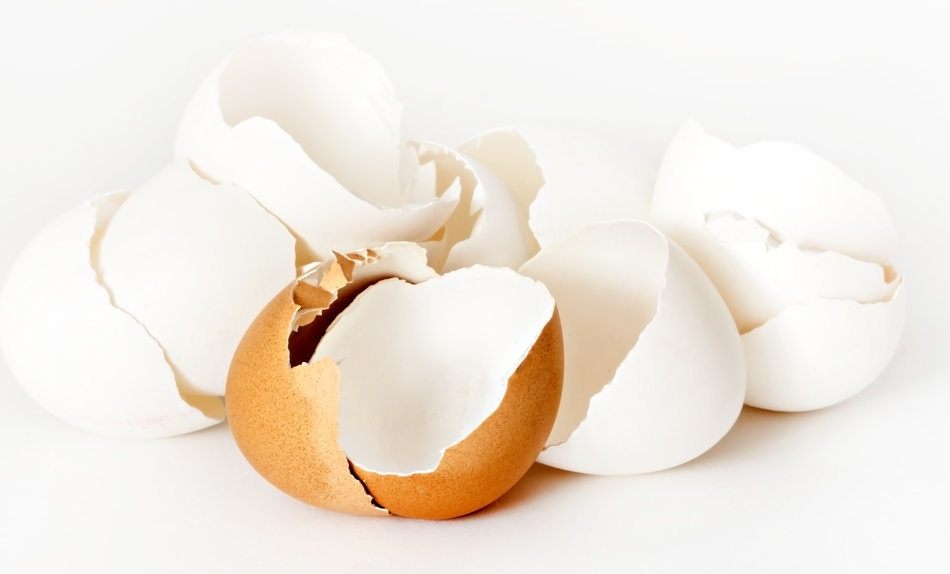
Eggs and eggshells can also be added to your soil to boost calcium. All plants need calcium, but tomatoes are one of those plants that really love it.
Some tomato growers swear by putting a whole, raw egg into the hole they have dug to transplant their seedlings. If you do this, make sure your hole is deep enough to avoid some opportunistic rodent digging up the meal you meant for your tomatoes. While there’s something romantic about plopping that whole egg in the soil, many gardeners argue that there are better ways to get that calcium to your plants.
One option to make the calcium in eggshells more accessible to plants is to crush or grind them up and then work them into the soil. Baking the shells beforehand can avoid salmonella and reduce the risk of attracting pests. Another method, which appeals to me in its simplicity, is to save water that you have boiled eggs in. Let the water cool and add that to your garden soil.
Another option worth mentioning is to create an eggshell-vinegar solution. Grind up your baked eggshells and add equal parts vinegar; the mixture will foam, and you can let it sit for about half an hour. Dilute it into a gallon of water, and slowly add it to your tomato plants, particularly before they flower.
General care during the growing season
Okay, the soil is ready. You have seedlings, either grown yourself or purchased. Time to bring those baby tomato plants home to the garden! Here are some things to keep in mind:
Timing is everything
Only plant your tomatoes into the garden once they’re at least 4-5 inches tall, and nighttime temperatures are at least 50-55 degrees Fahrenheit (about 12 degrees Celsius). Only plant seedlings that have been hardened off properly. Remember to plant your tomatoes deep into the garden soil, to promote that root development off of the stem.
Optimal plant spacing
Check your seed packet, or do some research, to find out how big your type of tomato plant is expected to get. Often, a recommended space between plants is given. Pay attention to this! Overcrowding the plants will actually decrease productivity, not increase it. Don’t make your plants compete for sunlight or space, and inadvertently create an easy path for pests and disease to travel.
Caging vs. staking tomatoes
Before you put those tomatoes into the ground, consider what kind of support they’re going to need as they grow. Figuring this out before putting your plants into the garden can avoid damaging their root systems later on. Almost all tomato varieties require some kind of support to keep them up off the ground; this helps keep them disease free, avoids rotten fruit, and encourages them to produce more tomatoes.
A stake is a post that a tomato plant needs to be secured to. A cage is a circular structure that surrounds the plant and provides several horizontal layers for branches to lean on. Generally, cages are used more than stakes, but the answer to which is best really depends on what type of tomatoes you’re growing.
Water consistently and appropriately
When you first transplant your tomatoes, make sure you give them a good, thorough watering to help them thrive in their new home. From that point on, you need to keep the soil moist but also be careful not to over-water. Generally, once a day, preferably in the early morning, is good; depending on how hot and sunny it’s, you may need to water twice in a day.
When you water your plants, water them slowly at the stems, not on the leaves, to avoid disease. A layer of mulch helps keep the water where it belongs–in the soil, for your plant to access.
Pinch off suckers
As your tomato plant develops more branches and leaves, you will see “suckers” begin to grow — these are small branches that shoot off from the main stem, right at the point where another branch is growing. Particularly by mid- to late-season, there are a few reasons to get rid of these suckers: they can cause overgrowth, restricting sunlight and space for other branches and increase risk of disease, and they can “suck” key nutrients and energy from the main stem and larger branches.
Although some gardeners argue that pruning these suckers is not needed, many others claim that it’s key for growing more fruit and better fruit. Pinching the suckers off gently with your fingers leaves a wound that is more easily healed than if you used a knife or scissors.
Seaweed fertilizer
Seaweed fertilizer leads to “sweet” success! Seaweed contains many nutrients that help boost tomato plants’ production. Liquid seaweed fertilizers are organic and natural, making them gentler on plants and carrying less risk of over-feeding.
Common tomato problems
Don’t let these common problems specific to growing tomatoes get in the way of your tasty harvest. In most cases, they can be easily prevented or treated.
Blossom end rot
Blossom end rot. I know it well. It happened to my tomatoes last summer.
Blossom end rot is usually identified by a black, water-soaked spot on the blossom-end of the tomato fruit. Google some images–it’s not appetizing.
While blossom end rot looks like it could be due to some nasty disease, it’s actually a sign of calcium deficiency in the plant. To add calcium to your soil, consider adding eggshells or egg water as mentioned above!
Cutworms
You’re not the only one hoping to dine on tomato plants. Cutworms see your plants as a tasty treat, and they can devastate your entire crop. Cutworms are moth larvae that hide during the day and are active at night. They can chew through the tender stems of young plants, killing them, and damage more mature plants by eating their leaves.
There are a few different ways to deal with cutworms.
One way to prevent cutworms altogether is to place moth traps around your tomato plants. This gets to the source of the cutworms–the moths who lay them.
To protect young plants from potential cutworm invasion, you can also create a physical barrier that cutworms are not likely to climb over. Start by cutting 3 by 10 inch strips of flexible cardboard, such as the cardboard from a cereal box. Bend the cardboard into a circle and secure the ends together. Push this “collar” of cardboard into the soil, surrounding a young tomato plant.
If you know you’ve got a cutworm problem, one method of dealing with them is to sprinkle about half a teaspoon of cornmeal around each tomato plant. Cutworms will eat the cornmeal before they get to the plant, and it will kill them. You can also face the cutworms head-on, carrying a flashlight with you into the garden at night to catch them in the act. Pluck cutworms off of your plants and toss them into a dish of soapy water to kill them. Gloat over their demise.
Fusarium
Fusarium is a common disease that can infect tomato plants, resulting in yellowed, wilting and stunted plants. The fungi is soil-borne, can last for years in soil, and enters the plant at the root system. Eep. While there may be various reasons for wilting, if you scrape the stem of an infected plant, you will see browning of the inner tissue.
When it comes to fusarium, there’s no cure. The best you can hope for is to contain it by pulling up any plants that are infected (I know, that hurts) and to be vigilant when buying seedlings from greenhouses.
To avoid potential infection, you can grow tomatoes in uncontaminated soil in containers, being sure to clean and disinfect any gardening tools that might carry the disease. Another prevention method is to ensure that your soil is well-drained, avoiding naturally wet areas of your garden.
Tomatoes not ripening
You’re so close to that tasty harvest, when, unexpectedly, the fruits of your tomato plant stop ripening. What is going on?
There are some obvious reasons your tomatoes may not be turning that juicy red color–they may just need more time, or they might be a green tomato variety!
If they truly are not ripening, it’s likely a temperature problem. If temperatures are too cold or too hot, ripening slows or stops altogether. If needed, you can harvest the tomatoes to ripen them indoors. Wait until they’re at least showing early signs of color change, if possible, and don’t put them in the fridge! This will stop the ripening process and ruin their flavor (temperature problem, remember?). Put them in a covered spot, like inside a paper bag; this will allow the ethylene gas that the tomatoes give off, which promotes ripening, to help trigger the ripening process.
How to harvest
Like planting, transplanting, and growing–taking the time to research just a little bit before hurrying to harvest will pay off.
When to harvest tomatoes
Tomatoes are usually ready to harvest before they look like the ones in the grocery store (which, likely, were picked long before you see them). Some tomato varieties get quite heavy when ripened on the vine, so it’s best to pick them before they’re entirely red.
Harvest tomatoes when they’re mature, but still green. The trick is to look for the first sign of color change–that first blush of red, typically found on the bottom of larger tomatoes. You can pick them later than this, but don’t pick them earlier!
How to pick & store tomatoes
Harvest the tomatoes by firmly but gently holding the fruit and breaking it away from the stem. The riper the tomato, the more susceptible it’s to being damaged, so handle them carefully. Keep tomatoes covered under newspaper or in a paper bag, stored at 55-70 degrees Fahrenheit (13-21 degrees Celsius). This allows the tomatoes’ gases to complete the ripening process.
Once again, don’t store tomatoes in the fridge! Keeping tomatoes refrigerated is part of the reason that store-bought tomatoes often have sub-par flavor. Preserve the superior taste of your garden tomatoes by avoiding that mistake!
But what if you’re harvesting a variety of tomato that is supposed to stay green when ripe? As mentioned earlier, green tomatoes can give a unique, tangy flavor to various dishes; they’re not as common in the grocery store, so many gardeners enjoy the opportunity to grow them. To know when to harvest a green tomato, you’ll mostly rely on touch. Green tomatoes should feel like a ripe red tomato when they’re ready for picking; no longer rock-hard, you should feel some “give” when you press the tomato with your finger. Some green tomato varieties will have a touch of color, sometimes yellow or pink depending on the type, when they’re ripe.
Related Questions
When should I buy tomato plants?
If you’re purchasing tomato plants rather than growing your own from seed, purchase the plants when it’s safe to plant them into the garden. This is after the last frost date for your growing zone, once nighttime temperatures in your area are at least 50-55 degrees Fahrenheit (about 12 degrees Celsius).
Remember that you need to harden off the plants, in case that was not properly done by the vendor. Slowly expose plants to the elements. This process can take a full week, but ensures that your seedlings will thrive in their new environment.
When should tomatoes be planted outside?
Tomato plants should be planted outside after the last frost date for your area, and once nighttime temperatures are at least 50-55 degrees Fahrenheit (about 12 degrees Celsius). If possible, wait for a weather forecast of a stretch of good weather.
Don’t forget that tomato plants should only be put into the garden after they have been hardened off properly.
Why aren’t my tomatoes ripening?
Your tomatoes are likely not ripening because of a temperature problem. If the weather is too cold, or too hot, ripening slows or stops altogether. According to Cornell University, the optimum temperature for ripening tomatoes is 70 to 75 Fahrenheit (21-24 Celsius).
Good luck!
Tomatoes are a popular vegetable to grow in home gardens, but, for most North Americans, we’re growing a plant that hasn’t originated in our climate. Hopefully, with a little bit of coaxing and a little bit of care, you will have your most productive tomato year yet!
From salads to sauces to snacking, it’s going to be worth the effort.

