Spirulina–a type of algae–is rich in protein, vitamins, and antioxidants–some folks call it the “best food for the future.” A few supplies and a couple of tips are all that you need before growing this superfood in your own home.
For growing spirulina, pour filtered water, spirulina nutrient solution, and then the live spirulina culture into a transparent tank. Place the tank in a warm, sunny place and keep the temperature around 95°F. Occasionally stir the solution and check that the pH is 8-10. Harvest after 3-6 weeks.
OK, so I admit it’s a bit unorthodox to grow algae, especially if you’re used to digging in the dirt in your garden. But spirulina is actually pretty cool! It’s easy to grow, and has a ton of research-proven health benefits.
What is spirulina?
Even if you’re an avid gardener, you probably haven’t grown something like this before.
Fresh, living spirulina is a type of cyanobacteria, a “blue-green algae”.
It undergoes photosynthesis, but is different from common land plants because it grows in water.
Without any need for soil or outdoor space, growing spirulina is surprisingly easy.
Plus, since it’s grown inside, seasonal changes can’t stop you from cultivating and harvesting year-round.
Spirulina is typically found in warm lakes with a pH above 7, though it’s certainly not picky.
It can also be found in hot springs and salt water.
That said, these little guys will be just fine if you forget to check on them for a day or two.
They’re survivors.
Interestingly, spirulina actually prefers alkaline conditions where many other organisms can’t survive.
It actually grows best in water with a pH between 8-10.
It’s not quite an extremophile like the microorganisms thriving around volcanic plumes on the seafloor or in the boiling pools in Yellowstone, but it’s a pretty tough critter.
A low-maintenance crop
Along with being easy to grow and sustain, spirulina is also easy to harvest.
And afterwards, it can be eaten right away, or put in the fridge (up to 3 weeks) or freezer.
All of this is to say that spirulina is working for you, not the other way around.
Benefits of spirulina
The health benefits of spirulina are surprisingly diverse. It’s no panacea, but there’s ample scientific evidence that it has real, substantiated benefits.
So, I’ll get all science-y while I dig into the benefits of spirulina.
High nutritional content
Spirulina provides more protein than most vegetables.
So it definitely beats ice cream (health-wise).
Antioxidant and anti-inflammatory properties
Just 3 grams! Holy crap–that’s better than a V8! Another point for spirulina.
Reduces allergy symptoms
Achoo!
Ah, the wonderful sound of spring arriving–and bringing allergies with it.
Other potential health benefits
In addition to all of these findings, it’s believed that spirulina can also help manage blood sugar, high cholesterol, diabetes, cancer, and more.
However, these claims require more research before they can be called conclusive.
Still, spirulina’s got a pretty good CV.
Materials needed to grow spirulina
Live culture
Alright, enough talk about the spirulina superfood, it’s time to get the stuff to grow it yourself.
The first and most important thing to buy is, of course, a live culture of spirulina.
While it shouldn’t be too hard to get your hands on some of this stuff, it might not necessarily be as easy as ordering your dog’s Halloween costume off of Amazon.
That’s because this spirulina is alive, and most countries aren’t going to let live bacteria past customs.
All that means is that you have to find someplace local who you can buy from, or at least someone in your country who can ship it to you.
If you already have an organic supplies store that you’ve ordered from before, start there.
Make sure that when you order it, the description has that keyword: live.
Nutrient solution
Spirulina needs nutrients in order to grow and multiply.
It’s probably best to buy a pre-mixed bag of minerals & nutrients along with the live culture.
Most places that sell spirulina will also offer entire growing kits, including the live culture, the nutrient solution, and often more.
Transparent tank
You’ll need some sort of transparent container that your spirulina can call home.
The tank size you should get depends entirely on how much spirulina you want to grow and how much you have room for in your house.
I suppose if you’ve got a kiddie pool or a full-size pool, you could go nuts & fill it with spirulina.
Many spirulina kits come with a flask or small tank that works perfectly for the amount of live culture given with it.
Commercially, spirulina is grown in pools, ponds, and lakes.
Finally, you have a reason to get a house with a pool.
Actually, please don’t grow it in your pool.
At least not your own pool…
Digital thermometer
Spirulina can survive over a wide range of temperatures, but if you want to make your culture nice and cozy, the water in the tank should be kept around 95°F (35°C).
Fine cloth
Despite the deep green color that spirulina will display, most of what’s in the tank is water.
When it’s time to harvest, that excess water needs to be squeezed out with a fine cloth.
Squishy, yes, but it’s oddly satisfying.
Besides, you’re used to getting your hands dirty in the garden.
Sunlight
Just like regular plants, spirulina performs photosynthesis.
Make sure that you have room near a window for your tank so the spirulina can soak up some sun.
Optional equipment
Heater
Your tank should be kept in a warm and sunny place.
If you already know that the temperature still isn’t going to be very close to 95°F, it could be worthwhile to also get a small, submersible heater.
You can find these at almost every pet store, and they can be put in any kind of container you decide to use.
Air pump
And if you’re already planning on making a trip to the pet store, consider getting an air pump/hose too.
You only need this if you want to make your part of taking care of spirulina even easier.
The culture needs to be agitated every once in a while, just so that all of the cyanobacteria can get some time in the sun and so that more oxygen can become available.
The same effect could be achieved just by stirring it, but with an air pump you’ll need to check on the spirulina even less.
And by “agitated”, we’re just talking about moving the water & li’l spirulina fellers around a bit–not shouting & berating them.
Treat those guys & gals with tenderness!
pH strips
You’re probably already familiar with how soil can be acidic (pH less than 7) or basic (pH above 7), and how that can affect the growth of plants.
The pH of the water in your tank is equally important to the pH of soil.
Like I mentioned earlier, one spirulina is interesting is because it actually prefers really basic conditions–where the pH is between 8-11.
Crazy, right?
So, for optimal growing conditions (right around pH of 10) check the pH regularly using some pH strips.
Getting started
With all your supplies ready, the growing process can begin.
Put your tank/container near the window, wherever you plan to keep it so that it’s warm and sunny.
Water (no cholorine!)
Next, fill about a quarter of your container with filtered water, like from a Brita or other filtered or distilled water source.
You want to make sure that there’s no chlorine in it, which would kill the spirulina.
Really, we don’t need anything in the water (like you might get from using tap water), because the next step is to add the nutrient mixture.
Follow the instructions on the package of your nutrient mixture when you pour it into the water.
If the minerals are in a powdered form, make sure that everything you add dissolves completely.
Mixing things up (gently)
Now, you’ve got what is referred to as the “medium” in which the spirulina can grow.
Before adding the culture, check the temperature of the water with the thermometer.
If you decided to get a heater for the tank, you can set that up to warm the water at this point.
Finally, once the water is at your desired temperature, add your live spirulina culture.
Again, follow the directions on the bottle you chose to buy.
You’ll probably pour in around half of what’s in the bottle.
If you bought a growing kit for spirulina and you choose to go with a container size other than what they give you, account for the difference in proportion to make sure you don’t add too much.
That’s pretty much all you need to do!
The spirulina should now be comfy, cozy, and full of yummy minerals.
Over time, add more nutrient solution and water to get the spirulina to multiply until you’ve reached the final volume you want.
And don’t worry if the solution looks a little thin at first.
Care & maintenance
Spirulina has been on the planet for billions of years, before most common plants and animals existed.
So it probably needs less TLC than a cactus.
Just make sure that your tank is consistently getting sunlight, and check that the temperature isn’t too high or low about once a week.
If it gets too low for a little while, the growth of the culture will slow down, but it won’t necessarily die.
However, if it gets above 104°F, the spirulina will likely die.
Remember to also gently stir the solution if you chose not to buy an air hose.
There isn’t a set rule on how often to agitate it–just enough that the spirulina cells don’t forget that they have work to do.
Once or twice a week should be enough to get oxygen and sunlight spread evenly.
Remember: they need oxygen to photosynthesize, so give it to ’em!
Keep an eye on pH
Also, since spirulina naturally prefers alkaline lakes, the pH of the solution should be kept above 7, ideally at 10.
I know this might sound crazy, since you’re used to growing veggies in soil with pH in the neutral to slightly acidic range, but spirulina are different.
The minerals in the nutrient solution will likely take care of the pH for you.
But if you notice that your culture is looking weak or continues to look thin after a few weeks, test the water with pH strips.
You can adjust the pH to make it more basic by adding a teensy bit of baking soda & water solution.
Just be careful to adjust a wee bit at a time–you don’t want to shock your li’l fellers.
You just want to make their home a little cozier.
Harvesting spirulina
Between 3-6 weeks after building the culture to your desired volume, the spirulina will be ready to harvest.
You can double check by using a pH strip: if the pH has been at 10 for 24 hours, it’s ready to be consumed.
Even if your culture looks thick, most of the solution is actually water.
So to harvest your spirulina, scoop out about a spoonful onto the fine cloth and squeeze out the excess water gently over the sink (or into a bucket or tank if you want to reuse the solution).
Rinse it again, squeeze it again, and you’re done!
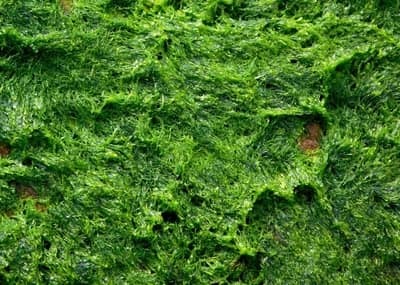
If it looks like dark green mush, you did it right.
Add in the same amount of nutrient solution back into the tank to restore what was taken out.
More will grow, and the culture will become thicker.
Check the pH again, and you can harvest regularly.
Depending on a lot of factors (how much sunlight the spirulina gets, how often it’s harvested, how big your container is, etc.), you can continue to harvest one culture of spirulina for about 6 months, give or take.
After that, the nutrient solution might make the pH too high, and it’s best to start again.
Storing & eating spirulina
So, what should you do with this green mush, anyway?
After harvesting, the spirulina can be eaten right away or stored in the refrigerator or freezer.
The only thing to try to avoid when preparing spirulina is cooking/microwaving it.
You can, but, like cooking vegetables, you lose some of the nutritional value by adding heat to it.
Fresh spirulina is almost completely tasteless and odorless, making it extremely versatile for serving.
So, add spirulina to anything you want! You can use it as a topping, add it to a smoothie, include it in lemonade, or even eat it all by itself.
Jeni’s Splendid Ice Creams Company actually adds in spirulina to their mint chocolate chip ice cream to shade it green.
Despite its maybe not-so-appetizing appearance, spirulina is a great way to add a little bit of health and DIY love to any meal.
And since you probably won’t even know you’re eating it, you can use it to secretly get your kids some vitamins and protein.
Let’s see, what else could you amp up with your green little friends?
- Anything St. Patricks: cookies, beer, cabbage
- Green eggs & ham
- Pesto
- salad dressing
Common problems growing spirulina & how to avoid or fix them
pH imbalance
After building your medium in the tank and adding in the live spirulina culture, it’ll look fairly thin & watery.
But if you find that your spirulina doesn’t start to thicken over a couple weeks, the first thing you should check is the pH using pH strips.
You can snag pH strips from a pet store.
(Your dog, cat, bird, or guinea pig probably doesn’t have a pH imbalance, but people with fish need to periodically check the pH of their aquariums).
Spirulina’s comfortable pH is about 10.
Generally, the nutrient solution should be enough to bring the pH of the filtered water up from around 8 to 10, but problems can still arise.
If you find that the pH is too low even after adding the nutrient solution, try adding a little bit of baking soda, which is made up of sodium bicarbonate.
If the pH gets too high (up to 11), add in some vinegar to your solution, which contains acetic acid.
Just add a little at first, & re-check the pH.
Nutrient imbalance
If you notice that your spirulina culture is producing a lot of bubbles, turn off your air pump.
If it continues or you weren’t using an air pump, it’s probably because of an imbalance in nutrient proportions.
Add some water and a little bit of baking soda (keep in mind that this may cause pH changes, so monitor the pH later).
If the bubbles continue after a couple of hours, add more culture medium (water and nutrient mixture).
Poor or slow growth
If you’ve followed the directions and measurements on the nutrient mixture, followed the directions on the bottle of live spirulina culture, and you checked that the pH is above 8, but your culture still isn’t thriving, it might be due to excess salinity.
Salt is neutral in solution, meaning it doesn’t affect the pH directly.
That makes it harder to detect.
Try adding a bit more water and live culture–this should dilute the NaCl present, if the salinity is what’s causing problems.
If the problem persists, it’s likely because of the quality of the spirulina live culture.
Get in touch with the company you bought it from to see if other customers have experienced a similar problem.
FAQs
How much does it cost to grow spirulina?
Of course, the cost of all the equipment depends on who you choose to buy it from and how much of the culture you get, but a general range for a spirulina grow kit will cost between $40 and $120 for all necessary supplies.
It’s actually a pretty inexpensive little project–with great health benefits.
Is fresh spirulina better than dried/powdered?
As a rule, fruits and vegetables are always better and healthier when eaten fresh than in a powdered/dehydrated form, and spirulina is no exception.
So, fresh spirulina is indeed better & has more health benefits than powdered spirulina.
Plus, some people report that powdered spirulina has a stronger odor and taste compared to fresh spirulina.
So, fresh spirulina typically goes unnoticed when mixed in other food.
How can the growth of spirulina be stopped if I can’t take care of it for a while?
If you want to stop the growth of your spirulina culture for a short time, slowly lower the temperature before leaving and keep the tank out of direct sunlight.
This should keep it alive for a couple of weeks–long enough to get back from your vacation in the Bahamas or boring business trip.
When you get home, put it back in the light source and slowly bring the temperature back up.
Related questions
How long does it take to grow spirulina?
It should take 3-6 weeks for spirulina to grow after adding the culture to the medium.
You’ll know it’s ready to harvest when it’s dark green and looks thick in the tank.
You can verify that it’s ready by making sure the pH remains around 10 for 24 hours.
How to grow algae?
To grow algae, you need: sunlight, water, live algae culture, nutrient solution, a thermometer, & a tank to contain everything.
An air pump & hose are optional, but will oxygenate the water & help the algae grow faster.
To harvest algae, use a fine cloth to strain the algae from the water.
Can you grow spirulina from powder?
You need a live culture of spirulina in order to start growing it.
In its powdered form, the spirulina cyanobacteria aren’t alive, and so they can’t reproduce and grow.
Unfortunately, getting live spirulina is more difficult than the powdered form, but the fresh spirulina is healthier.
What nutrients does spirulina need to grow?
In order to thrive and multiply, spirulina needs access to sodium bicarbonate, potassium nitrate, calcium chloride, iron sulfate, magnesium sulfate, ammonium sulfate, and citric acid, along with plenty of sunlight.
The best way to get this is from a kit specifically for growing spirulina.