Insulating your greenhouse is the best way to keep your plants warm during colder months and freezing nights. Without insulation, plants won’t grow properly, and could even die because of the temperatures. Greenhouses without insulation will protect plants from harsh weather conditions and will keep your plants warm during summer months, but I strongly recommend providing an extra layer of insulation to protect your plants from cold temperatures during the winter.
One of the best ways to insulate your greenhouse is to use bubble wrap because it’s cheap, simple, and efficient. Other ways to insulate a greenhouse include thermal insulation foil & polyethylene plastic. Besides insulation, you can add heat to your greenhouse using compost, heat lamps, space heaters, or adding thermal mass (jugs of water).
Be sure to cover every area of your greenhouse, as the insulation will not work as well otherwise.
Many gardeners choose to insulate their greenhouses because it can save both energy and money, as you won’t have to rely on heaters to keep your plants warm. Insulating your greenhouse may seem like a daunting task, but it can actually be quite easy and affordable.
Of course, there are many other ways that you can insulate your greenhouse, and there are pros and cons for all of them. Below I’ve listed the different methods that you can insulate your greenhouse and listed the pros and cons for all of them.
Using Bubble Wrap to Insulate A Greenhouse
In order to install bubble wrap in your greenhouse, you will need a tape measure, tape, staples, or small nails, and bubble wrap. First, you’ll want to clean the windows of your greenhouse in order to ensure that your plants will still get the light necessary in order to grow. Then, you’ll want to measure the vertical length of your greenhouse. After taking down the measurement, measure the bubble wrap, and cut it to the appropriate length. In order to make the task easier, cut the bubble wrap in smaller chunks, so that you are able to hold it in place without it falling. Next, place the bubble wrap on the walls and either, tape, staple, or nail it in place. Continue this method until every area of the greenhouse, including the ceiling, is covered because it won’t be insulated unless everything is covered properly.
It might be a good idea to get help from a friend or neighbor when installing the bubble wrap. Especially when it comes to putting it on the ceiling of your greenhouse, it can be difficult to place and tape when you’re installing it by yourself.
Pros of using bubble wrap insulation
- Bubble wrap is efficient
- Bubble wrap is cheap
- Bubble wrap is easy to install by yourself
- Bubble wrap is accessible
Cons of using bubble wrap insulation
- Bubble wrap can sometimes block out the light that plants need
- Bubble wrap will need to be replaced every few seasons.
I still believe bubble wrap is the most efficient method of insulating your greenhouse. If you use bubble wrap with bigger bubbles and clean your windows thoroughly before installation, your plants will still get the light that they need in order to grow. Furthermore, since this method is so easy and affordable, it is not a big deal to re-install every three or four seasons.
Thermal Insulation Foil
Using thermal insulation foil to insulate your greenhouse is very effective at keeping your plants warm. You can buy a role at any hardware store. The material has a layer of bubble plastic placed in between two layers of foil, so it will reflect both heat and light into the greenhouse. After cleaning the windows of your greenhouse, attach the foil to the north side of your greenhouse using staples, tape, or greenhouse clips. It would be simpler to measure your greenhouse and cut the foil to the appropriate length. Cutting the foil in smaller chunks, and attaching them one by one, would also make the process easier.
Pros of using thermal insulation foil
- Thermal insulation foil is effective at keeping your plants warm
- Thermal insulation foil is easy to find and buy
- Thermal insulation foil is easy to install
Cons of using thermal insulation foil
- Thermal insulation foil can prevent enough light from getting to your plants
- Thermal insulation foil can be expensive
Using thermal insulation foil is another great way to insulate your greenhouse. However, since it can block out some light, it should only be applied to the north side of your greenhouse. I would recommend using another method to heat your greenhouse beside only providing insulation to it.
Polyethylene Plastic Greenhouse Covering
Covering your greenhouse in polyethylene plastic can also be quite effective at keeping your plants warm during long winter months. You can buy this at most hardware stores for $20. This covering, however, can only be used for one season. It will not protect your plants from heat for a second winter season.
First, you’ll want to clean the windows of your greenhouse. This will let your plants get the sunlight that they need, despite an extra layer of plastic covering. Then measure the length of your greenhouse, and cut the plastic sheet to the appropriate length. It would be easier to cut the plastic in smaller chunks, so you are able to attach it in the easiest way possible. Hold the plastic in place, and either tape, staple, or nail it into the walls of your greenhouse. Make sure that you cover every area of your greenhouse in order to ensure proper insulation.
Ways to heat your greenhouse
Sometimes, the winter months offer extra cold days and even colder nights. In cases like these, it is sometimes a good idea to provide your plants with extra heat. This will provide your plants with extra protection so that you don’t have to worry about them in extreme weather.
I’ve listed multiple ways that you can provide your plants with extra heat, and I’ve also listed the pros and cons of each method.
Adding thermal mass using one-gallon jugs
Filling empty jugs with hot water, and placing them near your plants, is another cheap and easy way to insulate your greenhouse. In order to use this method, you will need empty one-gallon jugs, bleach and black paint. First, you’ll need to paint your empty jugs black. This will keep the water hot for a longer period of time. Fill your jugs with water, and mix in about a tablespoon of bleach. This will prevent the jugs from molding. Be sure to label your bottles so you don’t accidentally water your plants with them! Then, place the jugs in the pots of your plants, and around the base. This will amplify the sun’s heat rays and keep your plants warm. The water will absorb the sun’s heat energy during the day, and release it back during the night.
Pros of using water jugs for thermal mass
- Using one-gallon jugs is cheap
- Using one-gallon jugs is easy
- Using one-gallon jugs will keep the greenhouse above freezing
Cons of using water jugs for thermal mass
- One-gallon jugs are not as efficient, because they don’t rapidly heat up a greenhouse
Using one-gallon jugs will keep your plants that much warmer. It’s a simple and easy method, so it is probably worth trying just to provide your plants with extra protection. Using one-gallon jugs filled with water is just one more approach that will keep your plants warm throughout the winter.
You can also use larger jugs filled with water in order to further insulate your greenhouse. Using 55-gallon jugs, for example, would be even more efficient when it comes to keeping your plants warm. You can stack these in sizeable rows in order to take more of the sun’s heat energy. However, buying a lot of 55-gallon jugs can be expensive, as they aren’t something you necessarily have lying around your house.
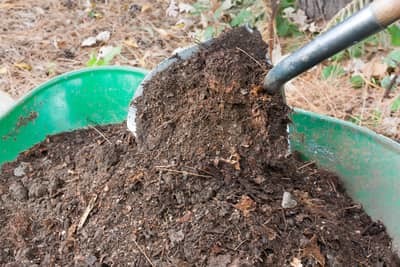
Compost
In order to use this method, you’ll need to build a separate composting area, or chamber, in your greenhouse. You can do this by stacking bricks or cement blocks to keep the compost separate from your plants. Put food scraps, yard waste, and even animal droppings in your compost. Instead of throwing away your cat or dog’s poop, simply put it in your compost pile! This is effective because as these scraps break down, the microbes give off heat, which can warm your greenhouse.
Composting is also great for the environment and provides you with a place to dispose of extra waste. It helps keep your plants warm, helps save the environment, and provides you with a place to dispose of waste, rather than just throwing it away.
Pros of using compost to heat a greenhouse
- Making a compost provides a convenient and helpful place to dispose of your waste
- Using compost is a natural way to warm up a greenhouse
- Compost is good for the environment
Cons of using compost to heat a greenhouse
- The compost can make your greenhouse smell bad, which isn’t harmful to the plants, but can be unpleasant for you
Making a compost pile will provide extra heat for your plants, and will give you a convenient place to dispose of waste. It is both healthy for your plants and healthy for the environment. It can be stinky, but if you can handle the smell it is well worth starting a compost pile for your greenhouse.
Heat Lamps
In order to use this method of insulation, you will simply need to buy heat lamps, and plug them in around your greenhouse. If you don’t already have these lying around, you can get these online, at most hardware stores and even in pet stores. They aren’t expensive either, and they are quite effective at keeping your plants warm during cold streaks. Simply hang up the heat lamps, or place them on the ground, and let them run. Since these will be plugged in all the time, I would also recommend using a fan to circulate the heat and to prevent the blubs from overheating.
Pros of using heat lamps to heat your greenhouse
- Heat lamps are fairly cheap to buy
- Heat lamps are easy to install
- Heat lamps are effective at keeping your plants warm
Cons of using heat lamps to heat your greenhouse
- Keeping the constantly running isn’t always best for saving energy
- If your power happens to go out during a cold night, your plants will not receive the heat they need in order to grow.
Using heat lamps provides your plants with more heat in an inexpensive and simple way. Heat lamps are super easy to install, and they will provide your plants with the warmth that they need. However, power outages are common during winter months because of extreme weather. In the case of a power outage, your plants will not receive the extra heat that they need. I would recommend using another method of heat as well to ensure your plants don’t freeze overnight in the case of a power outage.
Space Heaters
Space heaters are easy to install, and they do a fair job of keeping your plants warm during cold winter days. Simply plug them into the greenhouse, and let your plants feel the warmth. However, they can be pricey to keep running if this is the only method you use throughout the entire winter. They are best used when you’re in a pinch and have no other convenient way to heat up your plants.
Pros of using space heaters in a greenhouse
- Space heaters are accessible and take no effort to install
- Space heaters will keep your plants warm
Cons of using space heaters in a greenhouse
- It can be expensive to constantly have a space heater on in the winter
- Space heaters are somewhat inefficient because it only heats the air, not the plants
- Without other methods of insulation, such as the bubble wrap, the heat will not be contained in the greenhouse as well
Using space heaters can take up a lot of energy and it can be costly. However, it is convenient to use space heaters when you’re in a pinch. They can be very effective on extra cold nights, especially when you don’t have the time to install heat lamps or jugs.